

A resin spec sheet is the manufacturer’s technical data sheet (TDS): a document listing a resin’s measured properties and working conditions, every one of them tied to the temperature, cure schedule and test standard it was measured under. Knowing how to read a resin spec sheet means reading it in a fixed order, and knowing which numbers are only comparable when their test conditions match. That takes about ten minutes per sheet once you know where to look.
Two traps cause most of the bad buying decisions. The first is unit basis: one sheet quotes a 1:1 mix ratio by volume, the next quotes 1:1 by weight, and those are not the same thing. The second is cure schedule: a tensile strength quoted at 3 days and one quoted at 7 days are different measurements of the same material, and putting them side by side in a spreadsheet is comparing oranges to oranges.
Table of Contents
- What You Need
- Step-by-Step: How to Read a Resin Spec Sheet
- 1. Identify the resin grade and intended application
- 2. Read the composition and material classification
- 3. Interpret the physical and mechanical properties
- 4. Check processing and forming requirements
- 5. Review quality, consistency, and traceability
- 6. Assess safety, compliance, and environmental claims
- 7. Compare the sheet with your production requirements
- 8. Turn the specification into supplier questions
- Common Mistakes
- Frequently Asked Questions
- Conclusion: Start With the Application, Then Verify the Numbers
What You Need

You cannot judge a datasheet without knowing what you are judging it against, so gather these before you open the file.
- The current technical datasheet from the manufacturer, not a vendor summary. Vendor pages paraphrase numbers and drop footnotes. Check the revision code and date on the cover; a PDF you found in 2026 may be a superseded revision with different test conditions.
- The safety data sheet (SDS) for the same product and revision. It carries hazard, handling and personal protective equipment information that deliberately never appears on a TDS.
- A one-line statement of the application: casting a 4 litre tabletop, coating a floor at 2 mils, bonding two aluminium brackets, printing a 0.05 mm layer, or saturating a laminate. Every number on the sheet becomes interpretable against a job.
- Your process constraints: the mould or machine, the ambient temperature range you actually work in, the batch size, cycle time you need to hit, and the post-processing you can realistically do.
- Your performance requirements in numbers, even rough ones. A load in newtons, a temperature the part must survive, a film thickness, a chemical it must resist.
- Reference standards if you intend to compare across suppliers. ASTM D638 for tensile, ASTM D790 for flexural, ASTM D695 for compressive. Same standard, same comparison.
- A supplier contact who can answer questions the sheet does not. Every unreadable value becomes a question rather than an assumption.
Step-by-Step: How to Read a Resin Spec Sheet
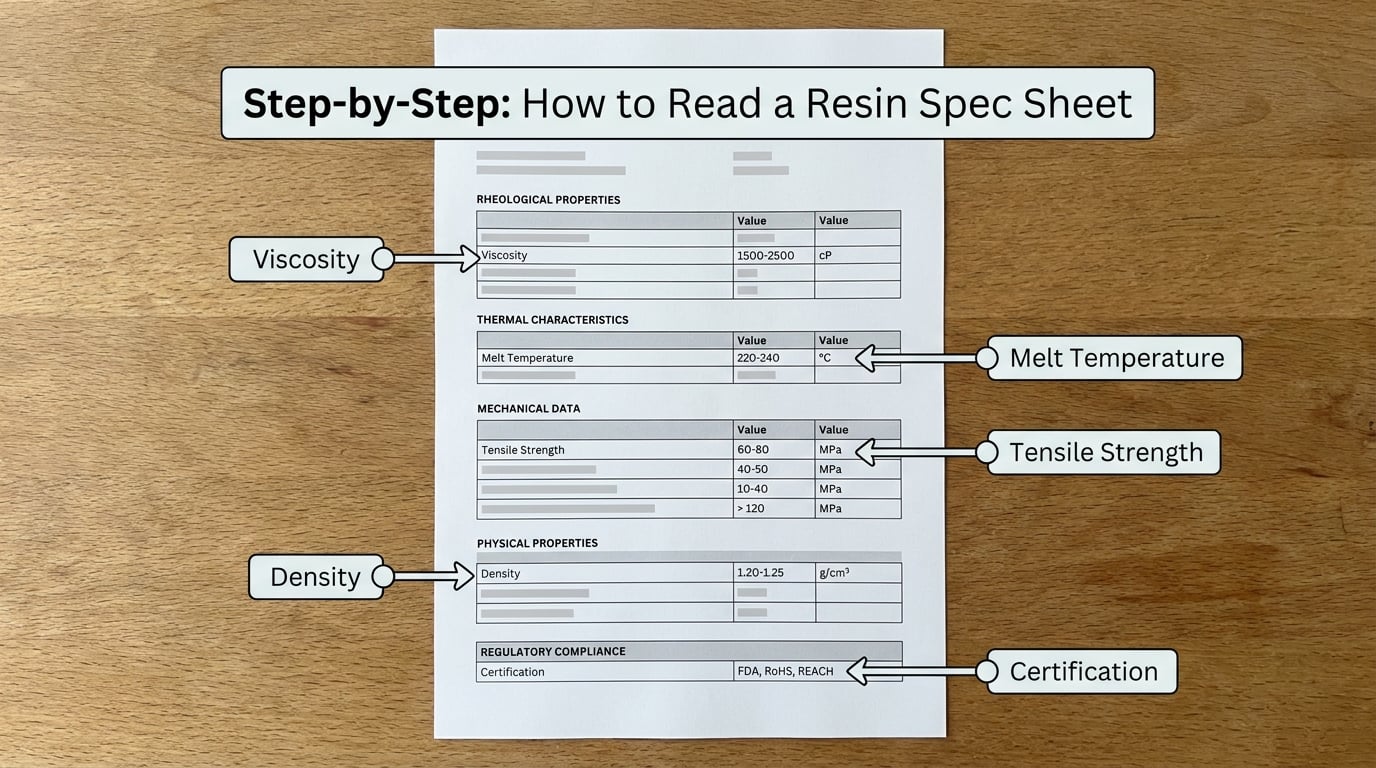
The workflow below follows the physical order of a real datasheet. Read it top to bottom once and you will have the material identified, its working window understood, its properties interpreted and its gaps listed. It works for a two-part epoxy casting resin, a polyurethane, an acrylic dispersion and a photopolymer just as well as for a commodity thermoplastic datasheet.
1. Identify the resin grade and intended application
Start at the top block, not the properties table. You are looking for the exact product identity: resin family, grade or formulation designation, colour, and the use the manufacturer states it is intended for. A datasheet is written for one specific grade, and neighbouring grades in the same family often share a document header but differ in the numbers below it.
Then confirm you are holding a genuine technical datasheet rather than a marketing summary or a distributor cut-down. A real TDS carries a revision identifier, a revision date, and the test standards behind its numbers. A summary page carries adjectives. If the file has no revision code, ask for the controlled version before you use a single value from it.
Most datasheet confusion starts with the document type, so pin down the four documents that get swapped constantly.
| Document | What it contains | Who publishes it | Use it for |
|---|---|---|---|
| TDS (technical data sheet) | Typical properties, mix ratio, cure schedule, application notes, storage | Manufacturer | Deciding whether the material fits the job |
| SDS (safety data sheet) | Hazard classification, handling, storage of chemicals, first aid, PPE | Manufacturer, formatted to regulation | Protecting the person doing the work |
| COA (certificate of analysis) | Measured results for one production lot, with actual values | Manufacturer, per lot | Verifying the batch you received |
| Sales or marketing sheet | Benefit claims, comparisons to named competitors, application ideas | Vendor or distributor | Generating interest. Never for approval |
In a dispute, the controlled TDS wins on performance, the SDS wins on safety, and the COA wins on what is actually in your drum. Marketing copy wins nothing.
2. Read the composition and material classification
The classification block tells you what the resin is made of, and this is the section that quietly explains every other number on the page. Note the base polymer or chemistry, any modifiers, the filler type and loading, recycled or bio-based content, and any stated limitations.
Filler content deserves its own attention because it changes the meaning of everything else. Unfilled epoxy is clearer, wets out fibre and filler more readily, and shrinks more. Filled grades are stiffer, dimensionally more stable, often stronger in compression, and typically less clear, with a higher density and a tougher surface finish. A 10 percent quartz-filled epoxy and a neat epoxy of the same family are not comparable line for line, and the datasheet will not warn you about it.
Thixotropy is another modifier worth flagging. A thixotropic grade holds its viscosity under shear and recovers when you stop, which is what you want on a vertical wall and what you do not want in a mould you are trying to fill from the bottom. If the sheet does not say whether the quoted viscosity is measured on a rising or falling curve, that is a question for step 8.
Abbreviations hide in this block too. Part A and Part B are the resin and the curing agent. EEW is epoxy equivalent weight, the number of grams of epoxy containing one mole of epoxide groups, and it tells you how to compute a stoichiometric mix. MEEQ or AHEW is the amine hydrogen equivalent weight on the hardener side, and dividing the two gives the theoretical mix ratio. Solids percentage, residual monomer and NCO content do similar work in acrylics and polyurethanes.
3. Interpret the physical and mechanical properties
This is where beginners lose the thread, because the table is usually sorted alphabetically and mixes the one number that matters to you with forty that do not. Reading a resin spec sheet well means knowing which fields carry a test condition and which do not, because that single distinction decides whether you can compare two suppliers at all. The glossary below covers the fields that appear on most resin datasheets. The ranges are indicative values for unfilled two-part epoxy at 23 to 25 degrees Celsius, given so you can tell whether a printed figure looks plausible, not as a substitute for the sheet in your hand.
| Field | What it means in plain English | Indicative range | Why you care |
|---|---|---|---|
| Density / specific gravity | Mass per unit volume | 1.05 to 1.20 g/cm3 unfilled; higher when filled | The only way to convert grams to millilitres; drives material cost per part |
| Viscosity | Resistance to flow at a stated temperature and spindle | 300 to 1200 mPa.s for typical casting grades | Decides whether resin wets out fibre and fine detail or sits on top |
| Mix ratio by weight | Grams of Part B per 100 grams of Part A | 100A:50B up to 100A:100B | Use a scale, not a measuring cup |
| Mix ratio by volume | Millilitres of Part B per 100 millilitres of Part A | Differs from the weight ratio for nearly every system | Checking what you are actually doing when you mix by eye |
| Induction time | Wait after mixing before pouring, so trapped air rises | 3 to 10 minutes | Skipping it puts bubbles through the casting |
| Pot life / working time | Time the mixed resin stays usable at the stated temperature | 10 to 90 minutes at 25 degrees C | Your entire working window; pour time must fit inside it |
| Gel time | When the mass stops flowing and becomes rubbery | 20 minutes to 4 hours | Demoulding and handling limits |
| Initial cure | Time to a handling-ready state | 4 to 24 hours | Cycle time; not the same as full strength |
| Full cure | Time to published or near full properties | 24 hours to 7 days | The only time the strength numbers are valid |
| Tensile strength | Pulling force the cured part resists (ASTM D638) | 40 to 90 MPa unfilled | Brittle adhesives and thin sections |
| Elongation at break | How far it stretches before failing | 2 to 6 percent unfilled | Low values mean a part that cracks rather than flexes |
| Flexural strength | Resistance to bending, often 3 to 5 times tensile | 80 to 130 MPa unfilled | Slabs, tabletops, anything spanning a gap |
| Compressive strength | Resistance to being crushed (ASTM D695) | 80 to 130 MPa | Compression moulding and mechanical parts |
| Modulus of elasticity | Stiffness in tension or flexure | 1.5 to 3.5 GPa unfilled | Deflection under load; compatibility with the substrate |
| Glass transition temperature (Tg) | Temperature where the cured part goes from rigid to rubbery | 40 to 80 degrees C | The real service ceiling, and often well below heat deflection temperature |
| Heat deflection temperature (HDT) | Load a sample carries at a stated deflection under load | 40 to 90 degrees C | Compare only against other HDT figures, never against Tg |
| Shore hardness (A or D) | Indentation resistance of the cured surface | Shore D 75 to 90 | Coating and floor specifications, abrasion expectations |
| Filler content | Share of the volume that is mineral or fibre rather than binder | 0 to 60 percent | Changes density, clarity, shrinkage, machinability and strength at once |
| Coverage rate | Volume needed to build a stated wet or dry film thickness | Typically 1 to 3 mils per coat for coating grades | Estimating material per unit area for floors and coatings |
| Shelf life | Storage time before properties drift, unopened | 12 to 24 months | Inventory planning and re-test dates |
Three rules keep you out of trouble here. First, never compare a figure across two sheets unless the test standard and test temperature match. Second, never read a strength number without the cure schedule attached to it. A structural adhesive datasheet might list tensile strength at 7100 psi after a 3-day cure and 8000 psi after a 7-day cure, with elongation at break moving from 2.52 to 3.41 percent over the same period, which is roughly 12 percent more strength for four extra days. That gap alone will change which product you pick for a part that ships on day three.
Third, remember that Tg and HDT are different measurements. Tg comes from a dynamic mechanical or differential scanning calorimetry curve; HDT comes from a loaded, deflected beam test. A part that must survive at 90 degrees Celsius needs an HDT figure above that temperature with a stated load and fibre span, and a Tg comfortably above it.
Units are where the numbers quietly lie to you.
| From | To | Conversion | Watch for |
|---|---|---|---|
| MPa | psi | 1 MPa = 145 psi | US sheets quote psi, European sheets quote MPa; 8000 psi is about 55 MPa |
| 1 mil | mm | 1 mil = 0.0254 mm | 5 mils is about 0.13 mm, not 5 mm |
| centipoise (cP) | mPa.s | 1 cP = 1 mPa.s | Identical units, different spelling; only the spindle and speed make readings differ |
| 25 degrees C | 77 degrees F | 25 C = 77 F | Publishers may print C, F, or both, and pot life is highly temperature sensitive |
| grams per millilitre | specific gravity | Divide by 1.00 to read specific gravity | The conversion that unlocks weight to volume for any resin |
4. Check processing and forming requirements
This is the section that decides whether the material can run on your equipment at all, and it is the one most often skipped. Extract the drying requirement, the melt or cure temperature, the mould or substrate temperature, the maximum residence time the resin may sit in a pot or barrel, the shear sensitivity, the shrinkage rate and its measurement condition, the quoted viscosity, the recommended process, and the stated limits of the process window.
Temperature is the hidden variable in all of it. Nearly every manufacturer prints one number and one temperature, typically 25 degrees Celsius or 77 degrees F, and often notes that initial cure times assume that temperature unless stated otherwise. Run a workshop ten degrees cooler and gel time silently extends, which pushes your pour past the end of the usable pot life and produces the soft, gummy cast that people blame on the resin rather than the clock.
For coating grades, this is also where coverage rate, film thickness per pass, the recoat window and surface preparation requirements live. A coating system with a 4-hour recoat window will not accept a second coat the next morning, and a substrate listed as unsuitable for adhesion is a design constraint, not a footnote.
For printing and casting processes, the same block gives you the cast or layer thickness range, the light or heat energy required for a photopolymer, the viscosity window that keeps the printer or the mould workable, and the pressure or vacuum conditions specified for a cast cure.
5. Review quality, consistency, and traceability
Typical values and guaranteed specifications are different animals, and the difference is where purchasing disputes live. A typical value is a representative measured result that describes the material. A specification is a limit with a stated tolerance that the supplier commits to, and it is normally expressed as a range rather than a single number.
Look for the tolerance on each critical property, the inspection method used to control it, and the certificate of analysis that accompanies each production lot. Then check lot-to-lot consistency: does the supplier publish a range across recent batches, and will they send a COA for the specific lot you receive? A COA is the only document that tells you what is in your drum rather than what is typical of the family.
Traceability continues past the certificate. You want the batch or lot number recorded on the drum, a re-test date for the lot, a sample approval step before full production runs, and a written change-control commitment. If a supplier reformulates, adds a filler source or moves a plant, do you get notice before the change reaches you? That question belongs in the purchase order, not in a conversation after the first off-spec batch.
Deviation handling is the other half. Agree now what happens if a lot lands outside the agreed tolerance: quarantine, retest, deviation approval by whom, and whether you may use it under a written concession. Without that, every off-spec lot becomes an argument.
6. Assess safety, compliance, and environmental claims
Separate what is documented from what is asserted. Documented compliance names a regulation and a certificate: food-contact status for the specific grade, RoHS or REACH declarations, a medical-device listing, a specific VOC content in grams per litre, or a recycled-content percentage with a defined basis and a chain-of-custody statement. A vague claim like eco-friendly or low impact is not a specification and cannot be verified at incoming inspection.
For handling questions, the safety data sheet is the correct document, not the TDS. A TDS may list flash point and may note that unreacted epoxy components can cause skin sensitisation, but the full hazard classification, exposure controls, ventilation guidance, first aid and disposal instructions belong on the SDS. If a supplier is evasive about providing one, that is a serious signal about the supplier rather than about the paperwork.
Pay attention to which component the claim covers. Sensitisation risk is usually the amine hardener, not the base resin. Food-contact approval often applies only to the cured article, only at a stated thickness and contact time, and sometimes only to one of the two components in combination. Recycled content claims need the mass basis, the part of the formulation covered, and whether the figure is a formulation average or a lot value.
Finally, check that the compliance statements are dated. Declarations that reference no regulation version and carry no issue date are marketing copy in a compliance costume.
7. Compare the sheet with your production requirements
Build a column-per-supplier matrix and map each datasheet value to a line in your own requirements, rather than collecting numbers. Rows should include functional requirements, process window, quality plan, supply risk and cost drivers, in that order.
Functional requirements come from the part: the load it carries, the temperature and chemicals it meets, the optical clarity or colour, the surface finish, the food or skin contact if any. Process window covers your equipment and your ambient range, and it is where a resin fails despite excellent properties, for example a long cure cycle on a line that reuses moulds every forty minutes. The quality plan row takes the supplier’s tolerances and inspection methods and checks them against your incoming plan. Supply risk covers lead time to qualification, single-source dependency, minimum order quantity, and the change-control answer from step 5. Cost drivers attach density and coverage rate to your part weight and area so you can compare material cost per finished part rather than per drum.
Then run a sanity pass on three things: does any value sit outside your process window even though it meets your performance need, is any published number taken at a condition you will never reach, and are you comparing typical against specified by accident. Those three checks eliminate most of the comparison errors that show up in resin purchasing.
8. Turn the specification into supplier questions
Anything you could not read, could not compare, or could not verify becomes a written question. Send the list with the purchase request so the answers arrive with the quote rather than three weeks later.
- Which test standard and which test temperature produced each property value you plan to rely on?
- What cure schedule, at what temperature, was each strength figure measured under, and is it a typical value or a specified minimum with a tolerance?
- Is the quoted viscosity on a rising or falling curve, at which spindle and speed, and at what temperature?
- What is the mix ratio by weight and by volume for the grade I will receive, and is the quoted ratio stoichiometric or a recommended working ratio with a tolerance?
- What filler type and loading percentage are in this grade, and how do the published properties compare with the unfilled version?
- Can you provide a COA for each lot, and what is the retest interval?
- What is the qualification lead time, the minimum order quantity, and what notice do I get before a formulation, filler source or manufacturing site changes?
- Which compliance declarations apply to this exact grade, and can you send them with an issue date and the regulation version they reference?
- Can you supply a sample lot for a processing trial, and will you accept a return if the trial results fall outside our agreed process window?
Ask for the answers in writing on the datasheet or a signed addendum. A verbal assurance from a distributor about a modified grade is worth very little when a batch arrives three months later.
Common Mistakes
Every one of these is common, cheap to fix, and expensive to leave in place.
Comparing values measured under different conditions. A tensile figure at 7-day cure next to one at 3-day cure, or a viscosity at 20 degrees C next to one at 25 degrees C, is not a comparison. Fix: add a test conditions column to your matrix and refuse to rank two numbers that do not share it.
Treating typical values as guaranteed specifications. Typical describes the family; a specification is a commitment. Fix: ask whether each value on your shortlist has a stated tolerance, and write that tolerance into the purchase order.
Ignoring the processing window. A resin with excellent properties can still be unusable because its cure cycle, mould temperature or residence time does not fit your line. Fix: put the process window next to your equipment numbers before you look at a single property value.
Reading a 1:1 ratio without checking whether it is by weight or by volume. A 1:1 by volume mix of most two-part systems is not stoichiometric, and the result is an off-ratio resin that never reaches full cure. Fix: use a scale for the weight ratio given on the sheet, and treat any volume figure as a convenience estimate unless the supplier states it is the mixing basis.
Overlooking filler or recycled content. Filled grades change density, clarity, shrinkage, machinability and strength simultaneously, and two sheets rarely call this out. Fix: record filler type and loading as its own column and compare like with like.
Mixing grams and millilitres. Bottles are sold by mass, slicers and moulds are specified in volume, and without the density figure on the sheet the conversion is guesswork. Fix: volume in millilitres equals mass in grams divided by density in grams per millilitre. It is one of the most looked-up conversions in 3D printing communities, and it sits on every real datasheet.
Reading the TDS for safety information. People hunt for PPE and hazard data on a spec sheet that does not contain them. Fix: request the SDS for the same product and revision, and treat a supplier who cannot supply one as disqualified.
Requesting a datasheet without defining the application. A general request gets a general document, and a general document cannot answer your question. Fix: send the part, the process and the three numbers that decide the job, then ask for the grade that meets them.
One more habit worth adopting: mark every figure you rely on with its source document, the revision and the date. When a supplier reissues a datasheet, you will be able to see at a glance whether your approved material silently changed underneath you.
Frequently Asked Questions
What does a 1:1 ratio of resin mean?
A 1:1 ratio means one part resin to one part hardener, but you must check whether the sheet states it by weight or by volume, because the two are not the same. For most two-part systems, 1:1 by volume is not the stoichiometric ratio and leaves unreacted resin or hardener, which caps the strength and keeps the part slightly soft. Mixing by weight using a scale is the safe practice. If the sheet gives both, use the weight ratio and treat the volume figure as a convenience estimate.
What is pot life in epoxy resin?
Pot life is the time the mixed resin stays workable at a stated temperature before it starts to gel. It is measured on the datasheet at one temperature, usually 25 degrees Celsius, and it shortens sharply as temperature rises. Pot life is not the same as cure time: you can be given ten minutes of working time and still need several days to reach full cure. Plan the whole pour inside the pot life, and remember the clock starts the moment Part A and Part B are combined.
What is the viscosity of epoxy resin?
Viscosity is how strongly the resin resists flow, reported in centipoise or the identical unit mPa.s, always with a test temperature and usually a Brookfield spindle number and speed. An unfilled two-part casting epoxy commonly falls between 300 and 1200 mPa.s. Low viscosity wets out fine detail and reinforcement but can drain off vertical surfaces, while high viscosity holds its shape and self-levels less. Two viscosity figures are only comparable if the spindle, speed and temperature match.
How do you tell if epoxy is fully cured?
You cannot confirm full cure from touch alone. Surface dryness or a light fingerprint means initial cure, not full cure, and ambient temperature changes the timetable by days. Treat the datasheet full cure time as the earliest point at which published properties apply, then confirm with a hardness reading on a test coupon from the same batch, or with a destructive test on a sacrificial part. Warm parts cure faster than cool ones, which is why a warm workshop is not a shortcut to a verified cure.
How is resin measured when the spec sheet only gives density?
Density is the conversion key. Take the mass in grams and divide by the density in grams per millilitre to get volume in millilitres, and do the reverse to turn a required volume into a mass. This is how you move between bottles sold by weight and moulds, slicers or mixers set by volume. Use the density for the exact grade you received, not a generic figure, and remember that filled grades are denser than unfilled ones and will give you a different answer.
Can I touch epoxy after 24 hours?
For most two-part systems, 24 hours reaches initial cure and possibly full cure if the ambient temperature sat near 25 degrees Celsius and the mix ratio was correct. A 5-minute epoxy reaches handling strength quickly but typically needs 24 to 72 hours for full mechanical properties, and a longer system may need a week. Handling a part early rarely causes harm to the resin, but any property you care about, strength, heat resistance, chemical resistance, should be assumed absent until the full cure time on the datasheet has passed at the actual temperature.
Conclusion: Start With the Application, Then Verify the Numbers
Four actions cover most of the risk. Define the application and the three numbers that decide the job, in writing, before you read anything. Obtain the current controlled technical datasheet and the matching safety data sheet from the manufacturer, and check the revision identifier and date. Verify the test standard, test temperature and cure schedule behind every value you intend to rely on, and refuse to compare figures whose conditions differ. Finally, turn every gap, every typical value without a tolerance and every unlabelled number into a written supplier question, and request a certificate of analysis with each lot.
Once you have done that, how to read a resin spec sheet stops being a puzzle and becomes a checklist you can run in minutes against any supplier, in any resin family.