
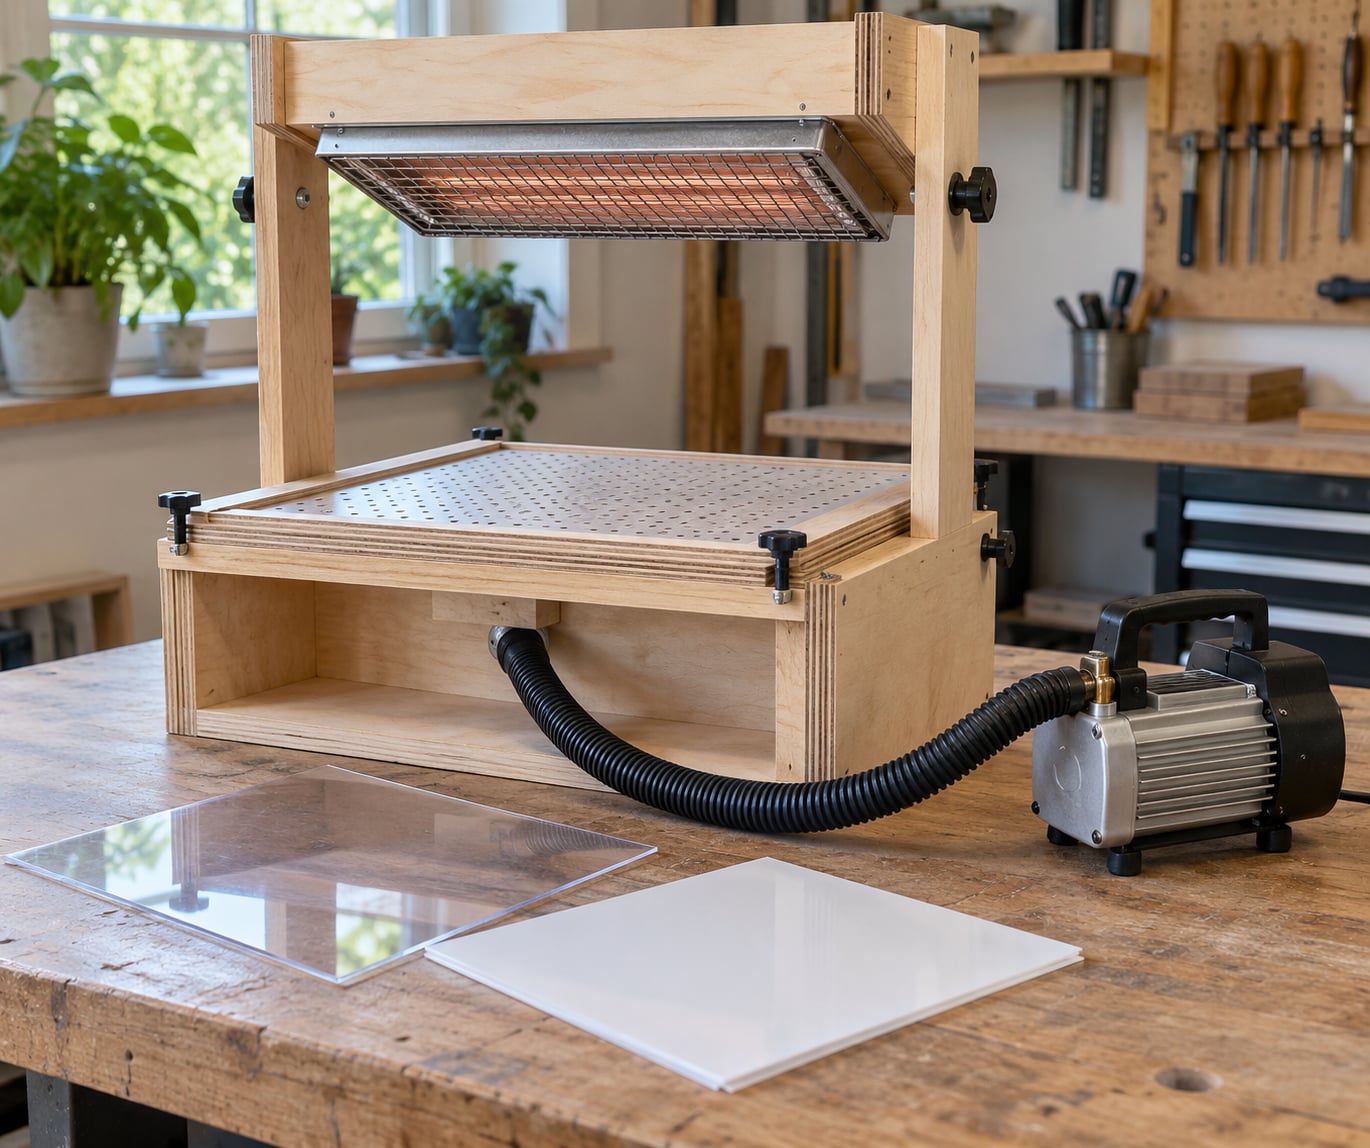
Building a vacuum forming machine is four systems in a wooden box: a frame that holds a sheet flat, a heater that softens it, an airtight vacuum chamber under the mold, and a pump that pulls the air out. Get those four right and a sheet of HIPS or PETG collapses onto your mold in about a minute. Most first builds take a weekend, and the biggest risk is not the frame, it’s the seal.
Below is the build order I would follow again, with a check you can run at every stage so a leak doesn’t show up three hours later. I’m writing for a maker bench, a small prototyping shop, or a garage, not a production line. That distinction matters: this machine makes good parts one at a time, and it will never match a commercial former for cycle speed.
Table of Contents
- What You Need
- Step-by-Step
- Common Mistakes
- Frequently Asked Questions
- How big should a home-built vacuum forming machine be?
- What plastic is best for vacuum forming?
- Do I need a dedicated vacuum pump, or is a shop vacuum enough?
- How thick a plastic sheet can I form?
- How to build a vacuum forming machine safely in a home shop?
- Is building your own machine worth it versus buying a tabletop one?
- Conclusion
What You Need
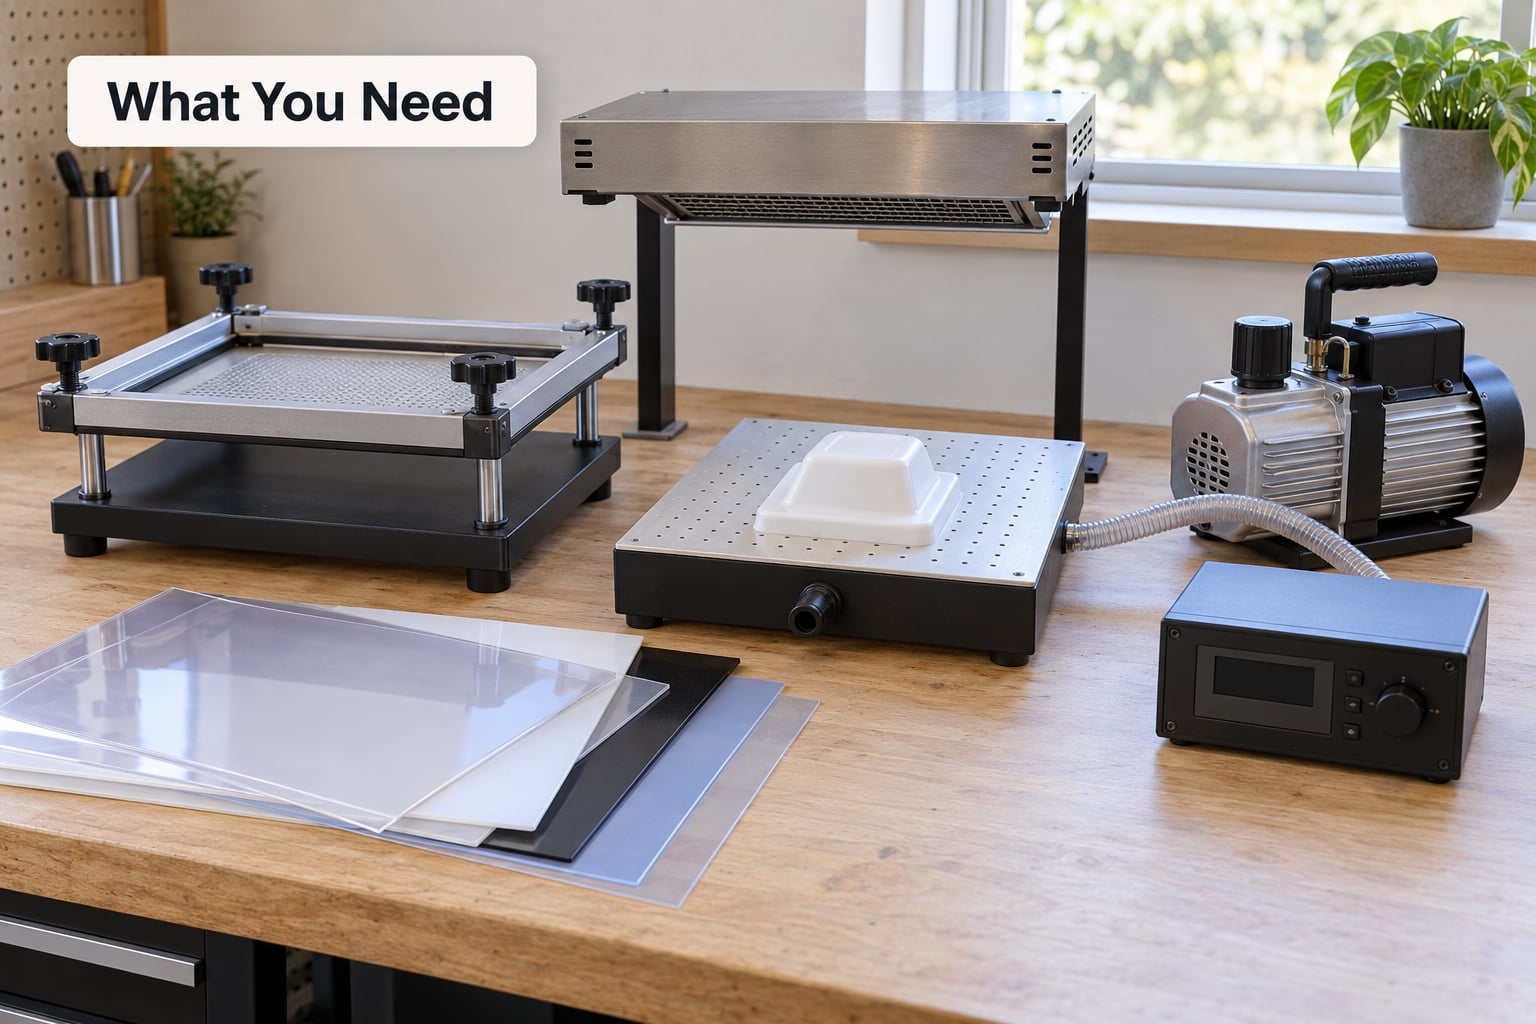
Here’s the list, grouped the way you’d actually shop for it. Buy the sheet first, because it decides your frame size, and everything else follows from that.
Frame and vacuum box
- Sheet material: 3/4 inch plywood for the vacuum box walls and mold table, 2×4 lumber for the base frame. MDF works and machines beautifully, but it softens if a heater sits too close, so keep MDF for the mold surface and use plywood for structure.
- Fasteners: wood screws, plus threaded inserts or angle brackets if you want the frame to come apart.
- Seal gasket: self-adhesive foam weatherstrip or silicone gasket tape on the frame lip. This is the part that decides whether your pump works.
- Sealant: paintable acrylic caulk for the interior box seams.
Vacuum system
- Pump: a shop vacuum of 4.5 HP or better, or a positive-displacement vacuum pump with its own receiver tank. A small household vac will not hold vacuum on a large bed.
- Hose: 1.5 inch or larger, rated for vacuum service, plus hose clamps.
- Receiver tank: a sealed drum or plastic tank that buffers draw-down so the pump cycles less.
- Filter: replaceable inline filter. Cheap motor, easy mistake.
Heating
- Heat source: a toaster oven for mini builds, a quartz or halogen radiant heater for a benchtop frame, or an infrared lamp bank.
- Sheet support: wire mesh or angle iron so the softened sheet doesn’t sag between the clamps.
- Shrouding: sheet metal or foil-faced board to contain radiant heat and protect the frame.
Mold table, controls, safety
- Molds: CNC-routed plywood or 3D printed parts, plus plywood or foam board blanks to cut parts around.
- Controls: a thermostat or PID controller matched to the heater type, a vacuum solenoid valve, an emergency stop, and a timer.
- Safety gear: eye protection, heat-resistant gloves, an extinguisher rated for electrical fires, and fume extraction.
Which specs actually matter
Three numbers decide whether your build is coherent. First, maximum sheet size, which sets the frame footprint and pump capacity. Second, maximum material thickness, which sets heater wattage, since thicker sheet takes longer to reach forming temperature through its full depth. Third, intended cycle time, which sets the size of the receiver tank.
A rough rule that keeps sizing honest: budget roughly 1 inch of vacuum box depth for every inch of mold depth. Deep draws need a taller chamber or the sheet will hit the bottom of the box before it seats.
Step-by-Step
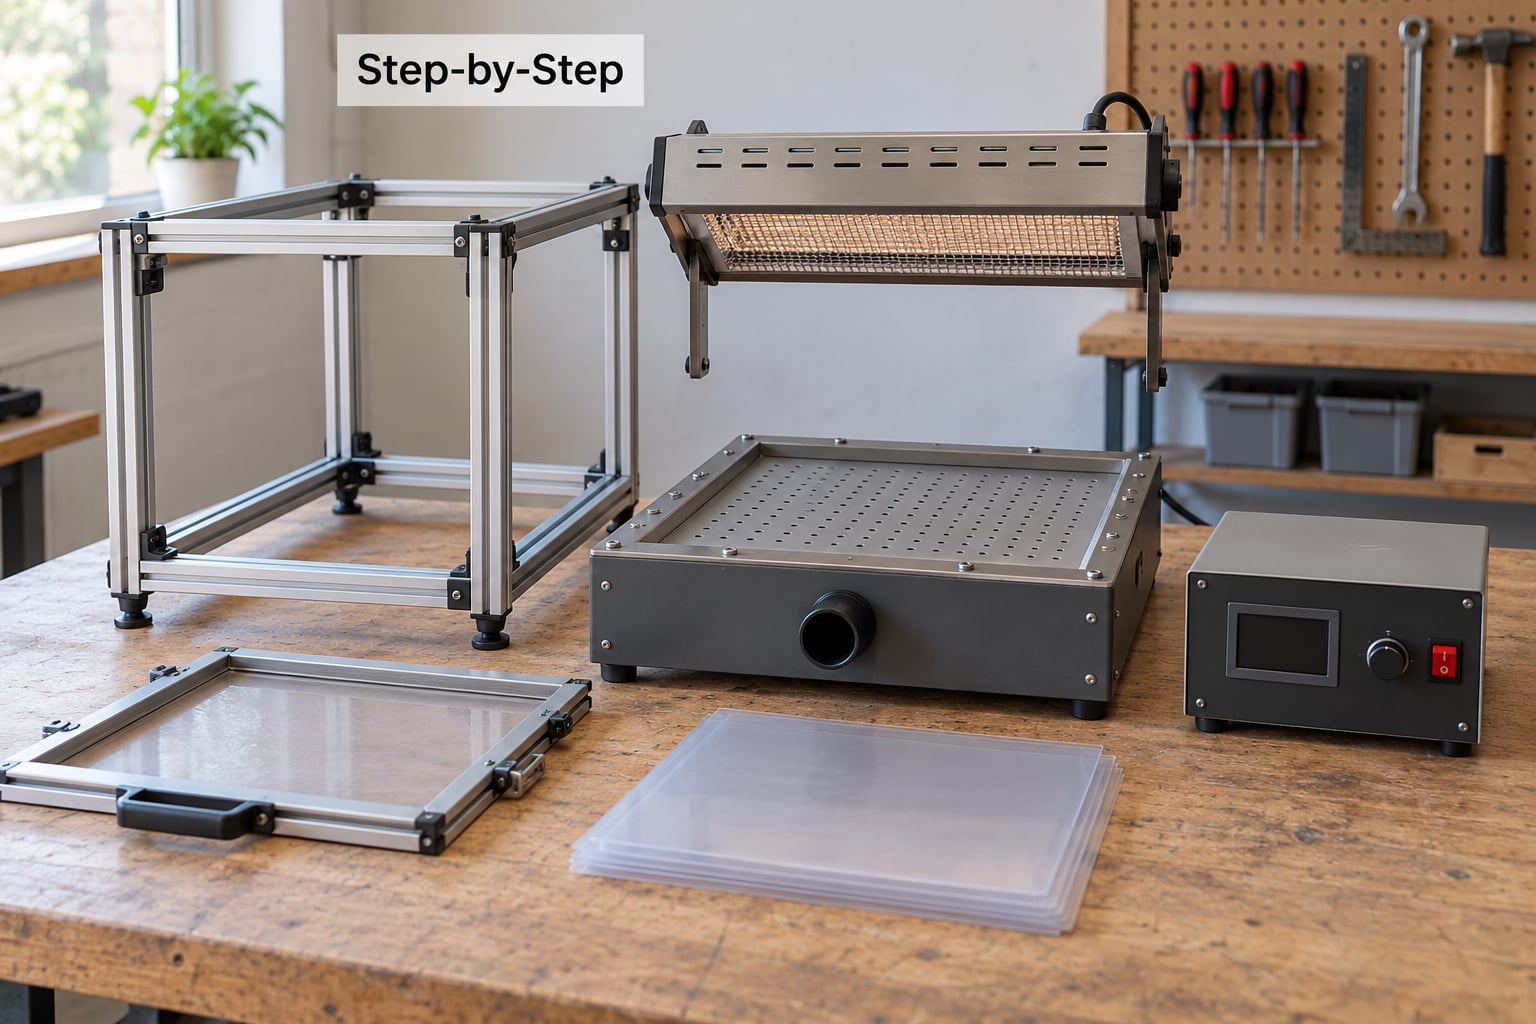
Build in this order and verify each stage before moving on. Skipping verification is how you end up chasing a vacuum leak that’s actually a crooked frame.
Plan the Frame and Working Area
Decide your maximum sheet size first, then build the frame at least 4 inches larger on each side. That extra margin is clamping space, and clamping space is where most home-built machines fail, because the sheet is only sealed if it can be pulled flat across the frame.
Leave room around the machine to remove formed parts. A vacuum box you cannot reach the back of becomes a machine you only form one part size on. Support the frame at four corners with adjustable feet, and check that the box cannot rock.
Sketch the layout before cutting: frame footprint, mold table height, where the heater mounts, where the pump sits, and where the exhaust vents. Getting the pump under the bench and the heater above the frame usually works better than everything on one level.
Build the Frame and Mold Table
Join the 2x4s flat on a flat floor, not standing up. Cross-brace the long sides so repeated heat cycles cannot twist the box. Many frame warping complaints trace back to a rectangle held together with four corner screws and no diagonal.
Attach the mold table to the top of the box so the interior cavity is fully enclosed. Drill airflow holes through the table, roughly 2 inches apart in a staggered grid, sized to match your hose. That spacing is the configuration makers on r/vacuumforming report as proven for larger tables, and it gives even draw-down without starving the center.
Skim-coat the table surface with paint or thin epoxy so the plastic releases. Level it with a straightedge across the top, and correct any high spot before the first pull. An uneven table shows up as uneven wall thickness in the finished part.
Install the Heating System
Mount the radiant heater above the frame on brackets that let you change the stand-off distance. Stand-off is the variable you’ll tune most, and you set the safe value yourself rather than trusting a printed number.
Shield the frame members and the box lip so radiant heat doesn’t cook the wood or the gasket. Shielding also stops the underside of the sheet from cooking while the top is still too cool.
Match the controller to the heater type. A thermostat with hysteresis is enough for a toaster-oven mini build. A PID controller pays for itself once you run thicker sheet or want repeatable cycle times.
Do not improvise the electrical connection. A heater draws real current, and extension cords and clip leads are a fire risk at those loads. Have the circuit checked by a qualified electrician and confirm the circuit is on its own breaker.
Add the Vacuum Chamber and Pump
Caulk every interior seam and let it cure fully before testing. Then seal the frame lip with gasket tape laid in one continuous strip with no gaps at the corners, since corners are where breaks show up.
Connect the pump to the box with clamped hose, and plumb the receiver tank so it sits between the pump and the chamber. The tank gives the vacuum source stored volume to draw from, which is what lets the sheet snap down fast instead of creeping.
Leak test before you heat anything: close the frame with a scrap sheet clamped down, run the pump for 60 seconds, and watch the gauge or a vacuum indicator on the hose. A machine that holds vacuum for a minute will hold it for a minute of plastic pull. If it does not, find the leak now with a soapy-water bottle, not later with molten plastic in the area.
For reference, a working draw-down on common thermoplastics lands somewhere around 28 to 29 inches of mercury at the chamber, held long enough for the sheet to seat. If you cannot get there, the pump, the seal, or the tank is the problem.
Wire the Controls and Add Safety Features
Plan the control sequence in this order: heat, clamp, vacuum on, hold, vent, release. Writing it down before you wire anything stops you from running a cycle where the vacuum kicks on before the plastic is soft enough to pull.
Include an independent over-temperature cutoff, not just the thermostat. A thermostat alone is one failure away from a burnt frame or a fire.
Add guards over hot surfaces and keep the heater’s shielded zone clear of storage. Wire an emergency stop that cuts heater power only, leaving the vacuum running so you can vent a hot part safely.
Grounding and enclosure follow local electrical code, and for anything beyond a small benchtop unit, have a qualified person check the connections before first power-on.
Test the Machine and Make a First Part
Commission in stages. With no heat, verify each control: heater off, vacuum on, solenoid open, vent open, emergency stop cutting power. Confirm the gauge reads what the valves say they are doing.
Then warm a scrap sheet gradually and watch it. Plastic that sags and droops at the edges is too hot. Plastic that stays rigid and springs back when you press it is too cool. That window is the whole skill of the machine, and it takes ten cycles before your hands find it.
Clamp the sheet with even tension all round. Bubbles mean trapped air from a loose clamp or a wrinkled sheet, not a pump fault.
Apply vacuum, watch the draw-down, and hold until the part cools to the touch. Pull it early and it relaxes; it comes off the mold flat and stays flat only when the plastic has lost its heat.
For your first part, use a simple dome or a straight-sided box with a draft angle. Sketches and prototypes in a shape you already understand will show you machine problems faster than an ambitious shell will.
Common Mistakes
Most of these show up in the first ten pulls. Each one has a fix.
Air leaks. The number one complaint in DIY builds. Corner gaps in the gasket strip and unfinished interior seams are the usual cause. Re-lay the gasket in one piece, and re-caulk any seam that moved.
Uneven heating. The sheet softens on one side and not the other, so the pull is lopsided. Fix stand-off distance before you add elements, and add a reflector rather than more heat. A toaster oven on a mini build gives the most uniform result precisely because the air is contained.
Insufficient vacuum. A household vac on a large bed won’t hold pressure, and makers running 36×48 tables report needing 4.5 HP plus a receiver tank. Match pump capacity to sheet area.
Poor mold alignment. A mold set off-center or not bolted down will let the sheet shift. Bolt the mold flat and confirm the sheet seals on all four sides before the pump starts.
Overheating the plastic. When the sheet darkens, blisters, or gives off a sharp smell, pull the heat immediately and let it cool flat. Damaged plastic cannot be re-heated and re-formed reliably.
Cooling too soon. Releasing the vacuum before the part cools gives you a part that relaxes on the bench. Hold the vacuum until the part is cool to the touch.
Unstable framing. A frame that rocks or twists ruins both the seal and the wall thickness. Cross-brace and level it before anything else.
Unsafe electrical or hot-surface arrangements. Improvised connections and unshielded heaters are the failures that hurt people. Ground properly, guard hot surfaces, and keep an extinguisher within reach.
Ventilation deserves its own note, because almost nobody covers it. Forming ABS and polystyrene releases fumes, and heat makes the release much worse. Run a fume extractor or a filtered intake near the machine, and don’t form in a closed room. Once your machine handles deeper or double-sided parts, read pressure forming vs vacuum forming explained to see whether the upgrade is worth it.
Operating tips: keep a scrap sheet ready for temperature calibration, label your controller’s setting per material, clean the interior of the box periodically so flakes don’t reintroduce voids, and change the filter before the motor starts running hot.
Frequently Asked Questions
How big should a home-built vacuum forming machine be?
Size it around the largest sheet you already own, plus about 4 inches of clamping margin on each side. For hobby work, an 18 by 24 inch bed handles most sheet plastic and stays manageable with a 4.5 HP shop vacuum. Larger beds need a bigger pump and a receiver tank, so buyers often build 18 by 24 first and add a smaller toaster-oven unit for scrap.
What plastic is best for vacuum forming?
HIPS and polystyrene are the easiest to start on, because they soften quickly, form cleanly, and trim well. PETG is tougher and resists impact better. ABS is durable but releases fumes during forming. Acrylic gives a polished finish but cracks around sharp corners if the pull is uneven. PVC is not recommended for heat forming.
Do I need a dedicated vacuum pump, or is a shop vacuum enough?
A shop vacuum is fine for small beds under about 18 by 24 inches, and it is the cheapest way to get started. Larger tables need more airflow than most household vacs provide, so makers running 36 by 48 inch surfaces report needing 4.5 HP plus a receiver tank. Positive-displacement pumps with their own tank are the next step up.
How thick a plastic sheet can I form?
A benchtop heater handles roughly 0.040 inch sheet well, which covers most HIPS, PETG, and polystyrene work. Thickness beyond about 0.080 inch takes far longer to heat through, so the surface softens while the core stays rigid and the draw fails. Thicker material needs more heater wattage and a longer dwell, or a commercial machine.
How to build a vacuum forming machine safely in a home shop?
Guard every hot surface, ground the machine properly, use an independent over-temperature cutoff, and keep an extinguisher rated for electrical fires within reach. Run a fume extractor whenever forming ABS or polystyrene, and never heat plastic in a closed room. Have any new circuit or fixed wiring checked by a qualified electrician before first power-on.
Is building your own machine worth it versus buying a tabletop one?
Building one wins on sheet size and mold depth, since commercial tabletop units rarely exceed about 24 by 36 inches. You also get control over automation and cycle timing. Buying wins on safety certification, repeatability, and the time it takes to get running. A DIY machine is best when you need larger parts or many small pulls over time rather than one clean result quickly.
Conclusion
Four things decide whether the machine works: a rigid frame, a continuous gasket, a sealed box, and controlled heat. Everything else is refinement.
Do this first. Pick your sheet size and material, then cut and level the frame and mold table with about 2 inch hole spacing. Get the vacuum seal holding before you install a heater, because testing a leak is far easier without hot plastic in the area. Add controlled heating, over-temperature protection, and fume extraction, then commission in stages before your first real part.
Once you’re running cycles consistently and want to choose between injection and thermoforming for larger runs, our guide on how to select a hydraulic vs electric molding machine covers the other side of that decision.