
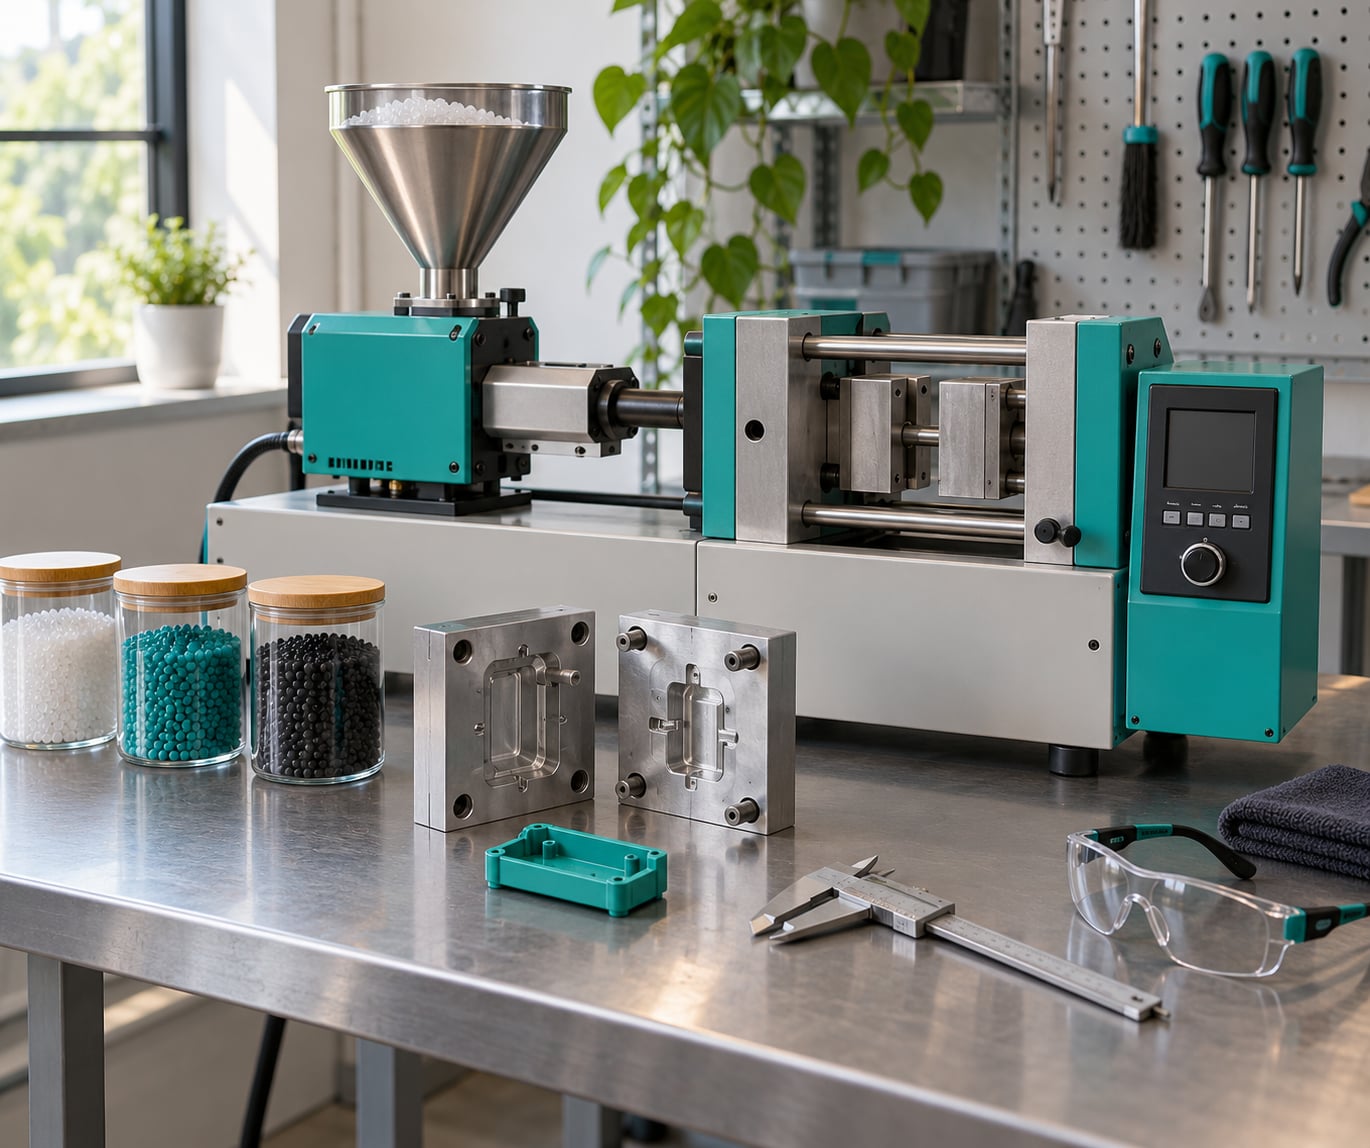
Yes, injection molding at home is realistic, but only with a rated desktop molding machine, an engineered mold, and thermoplastic pellets. Knowing how to injection mold at home is mostly about restraint: pick a simple part, control one variable at a time, and treat the first few dozen shots as training rather than production.
A household oven, a homemade heater, or a kitchen whisk will not hold a part to pressure. Real home molding uses the same five-stage cycle as a factory press — clamp, inject, pack, cool, eject — just at a much smaller scale, usually with a shot size measured in tens of grams.
This guide walks through what a safe home setup needs, how to run the first cycle, and how to tell the difference between a part that looks fine and a process you actually control. Budget a weekend for setup and a few weeks of iteration before you judge the machine.
Table of Contents
- What You Need
- Step-by-Step: How to Injection Mold at Home in Eight Stages
- 1. Choose a machine and part that fit home production
- 2. Select and dry the plastic
- 3. Prepare the mold and verify clearances
- 4. Set the machine temperature and initial settings
- 5. Run a cautious first shot
- 6. Evaluate fill, defects, and dimensions
- 7. Tune the cycle and cool the part correctly
- 8. Repeat, document, and scale up carefully
- Common Mistakes
- Frequently Asked Questions
- Is it possible to do injection molding at home?
- Can you 3D print a mold for injection molding?
- What is the best material for injection molding at home for a beginner?
- Can I make my own plastic injection molding machine?
- What causes the most common defects in home injection molding?
- How many times can a home injection mold be used?
- Conclusion
What You Need
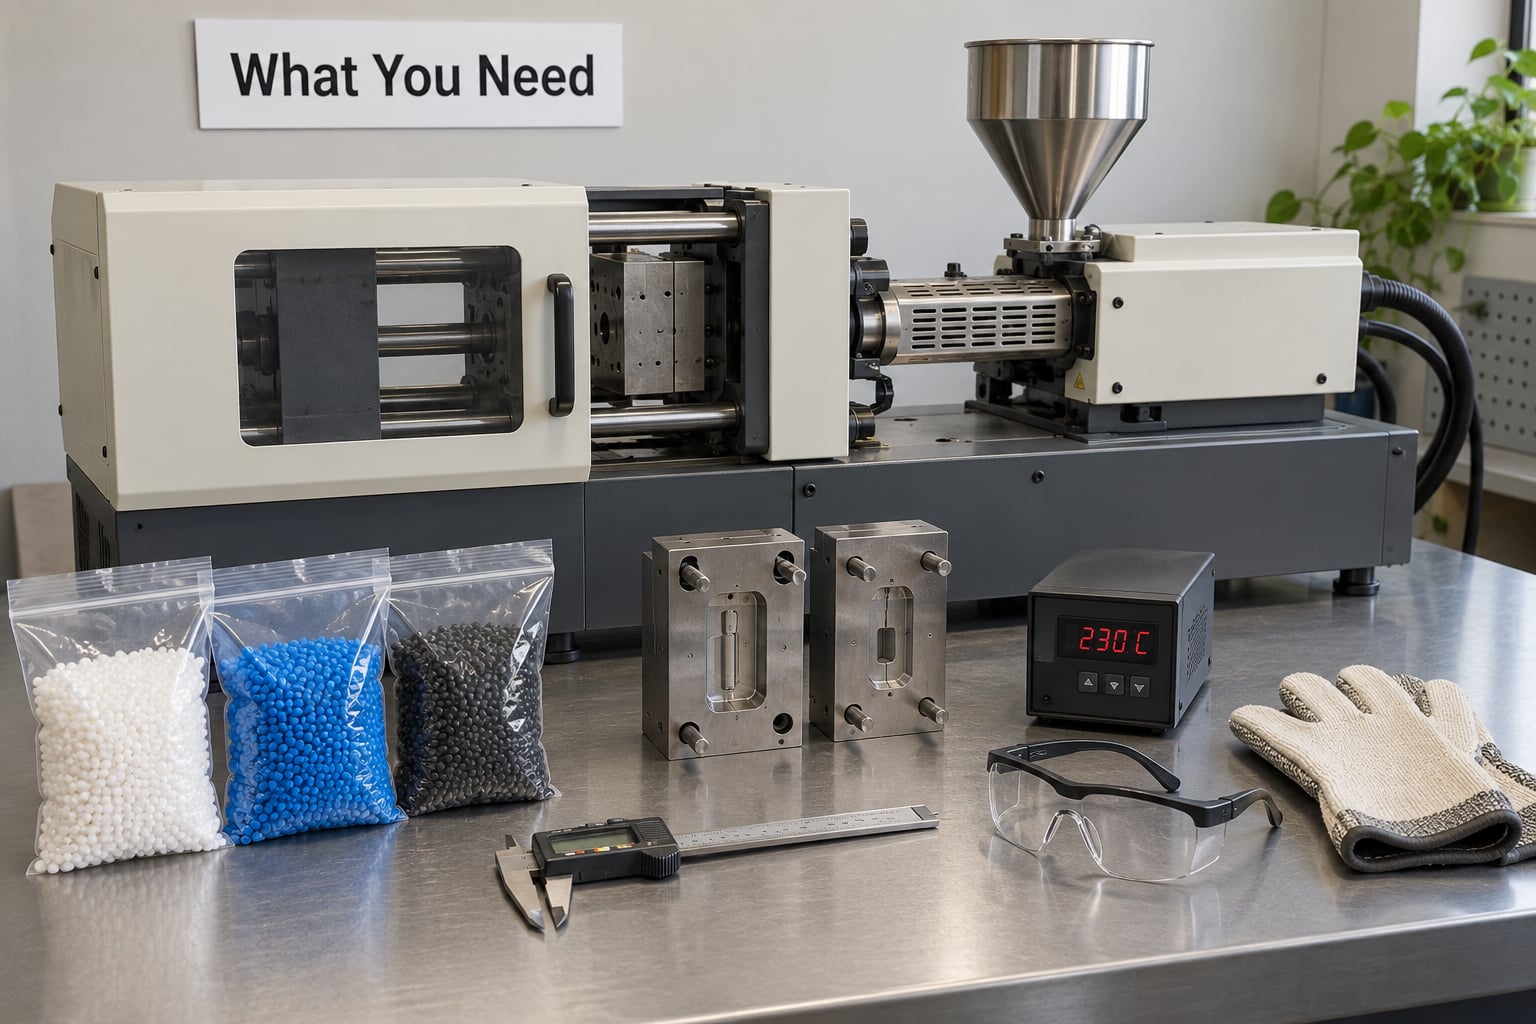
The home workflow has five pieces, and each one has a purpose. Skip any of them and you will spend weeks diagnosing symptoms instead of making parts.
- A rated molding machine. Manual, pneumatic, or hydraulic benchtop machines with real nozzle and clamp force, PID-controlled barrel zones, and a working emergency stop. A hand-built injector can work for low-pressure media, but it is a different craft from molding plastic.
- Molding-grade pellets. Polypropylene, high-density polyethylene, ABS, or nylon bought in small quantities from a plastics supplier. Avoid filament, scrap plastic, and anything not labelled for injection molding.
- An engineered mold. CNC-machined aluminum is the honest starting point. Printed high-temperature resin is workable for short runs; FDM prints and kitchen silicone are not.
- Temperature control and measurement. A barrel controller with at least three zones, plus a thermocouple or infrared thermometer to check melt and mold temperature independently of the machine’s own reading.
- Ventilation and protective gear. Local fume extraction at the nozzle, heat-resistant gloves, safety glasses, and a clear working zone. Never run a molder in a kitchen or an enclosed room with pets or small children.
Calipers, a process log, and a small drying box with desiccant round out the setup. People who skip the log always end up changing three settings at once, which tells them nothing about which change mattered.
If you want the short version: the machine and the mold decide whether you can mold at all. Everything else is refinement.
Step-by-Step: How to Injection Mold at Home in Eight Stages
1. Choose a machine and part that fit home production
Match three numbers before you buy anything: part mass, projected area, and cycle time. Part mass sets your required shot size, projected area sets required clamping force, and cycle time decides whether cooling or travel dominates your hour.
Shot size is part volume times material density, plus the sprue and runner, plus roughly 30 percent margin. A part that weighs 40 grams needs an injection unit that delivers about 55 grams comfortably. Clamping force follows the common rule of thumb of roughly 2 to 4 tons per square inch of projected area, so a 20 square inch part implies a press in the 40 to 80 ton range.
Start with a simple geometry: a clip, a small cap, a spacer, or a flat test coupon. Stop before anything thin and transparent, anything medical or food-contact, and anything load-bearing. Those parts expose you to burns, fumes, and liability without teaching you anything new.
Stop immediately if the machine’s rated shot size is under your calculated shot, or if its clamp force is below what your projected area demands. An undersized press will flash or stall before it fills.
2. Select and dry the plastic
Pick a polymer the supplier lists for injection molding and confirm the process window in the resin’s data sheet. Beginners get the cleanest results from polypropylene and high-density polyethylene, which are forgiving and nearly moisture-proof. ABS is versatile but hygroscopic, and nylon demands disciplined drying.
Dry hygroscopic materials exactly as the manufacturer instructs, in a desiccant dryer or heated dry box, then move them to a sealed container with fresh desiccant until you are ready to load them. Moisture in the melt causes splay streaks, bubbles, brittle edges, and wildly inconsistent shot weight from cycle to cycle.
Stop if the pellets look foamy, clump, or smell of sweet condensation. That is moisture, and no barrel temperature will fix it. Dry for another hour and try again.
| Material | Melt temperature band | Moisture sensitivity | Drying | Beginner fit |
|---|---|---|---|---|
| Polypropylene (PP) | 200-230 C | Low | Not required | Easiest first choice |
| High-density polyethylene (HDPE) | 180-230 C | Very low | Not required | Forgiving, flexible parts |
| ABS | 200-240 C | Moderate | 2-4 hours, desiccant | Good surface finish, needs discipline |
| Polycarbonate (PC) | 280-320 C | High | 4 hours plus, dry box | Demanding, high heat |
| Nylon (PA6, PA66) | 260-290 C | High | 4 hours plus, dry box | Strong, dimensional changes |
| Polylactic acid (PLA) | 180-220 C | High | 4 hours, gentle temperature | Easy melt, brittle parts |
| Polylactide (POM) | 185-215 C | Moderate | 1-2 hours, desiccant | Low shrinkage, tight tolerances |
These bands are starting points, not settings. Every barrel runs hotter or cooler than the nominal figure depending on screw design, heater bands, and shear, so trust the part over the label.
3. Prepare the mold and verify clearances
A home mold has to do three jobs: contain the pressure, fill without trapping air, and release the part without force. Inspect it before it ever heats up. Check the parting line for nicks, confirm the shutoff lands contact evenly around the whole cavity, and look for vents at the last place the melt will fill.
Design rules that matter more than anything else at home scale: one to two degrees of draft per side, uniform wall thickness around 1.5 to 3.0 mm for small parts, a gate placed so the flow front fills evenly, and vents roughly 0.02 to 0.05 mm deep at flow ends. Ejector pins belong near thick sections, never on a cosmetic face.
Check the installed mold height against the machine’s specification before you clamp anything. Confirm the nozzle tip meets the sprue bushing concentrically, and tighten hold-down bolts in a cross pattern so the two halves seat flat.
Do not drill, grind, or cut hardened tooling to make it fit without understanding the material and the risks. Aligned plates that drift a few hundredths of a millimeter will flash, and a modified mold with a changed parting geometry will never return to spec. A written mold maintenance schedule catches the small problems before they become scrap.
4. Set the machine temperature and initial settings
Start from the resin supplier’s guidance, not from another video’s settings. Set barrel zones so the melt temperature at the nozzle lands inside the material’s band, set mold temperature deliberately rather than by accident, and begin with a low screw speed so you can hear the motor straining before anything breaks.
Back pressure of roughly 5 to 10 percent of the injection pressure is enough for most home work. Hold pressure typically runs at 40 to 80 percent of injection pressure, and holding time lasts only until the gate freezes — a couple of seconds for most small gates, not the ten seconds that circulates online.
Barrel heater bands melt resin; they do not measure it. Verify actual melt temperature at the nozzle with an independent probe or thermometer, because a failed thermocouple or band reads perfectly normal while the melt is 30 C off.
5. Run a cautious first shot
Warm the barrel and the mold to the set temperatures and let both stabilize. Confirm the correct resin is loaded and that the material in the barrel is already purged of whatever ran before it. Check that cooling lines or air cooling paths are connected and unobstructed.
Keep hands, loose sleeves, and long hair away from the nozzle, the barrel, and the platens. The nozzle and nozzle adapter reach temperatures that cause serious burns, and the machine stores pressure energy even when it is not cycling.
Run a short initial cycle, then stand back and watch. Stop the machine immediately if you see a leak at the nozzle, a pressure spike beyond the rated range, smoke, a burning-plastic smell, a flash of melt around the platens, or any change in the sound of the screw. All of those mean stop, isolate, and cool down before you investigate.
Never clear a jam with a tool while the barrel is hot and pressurized. That is how most home molding injuries happen.
6. Evaluate fill, defects, and dimensions
The first good-looking part is not a controlled process. Run at least twenty shots and inspect ten of them against the same checklist, because a mold that fills on one cycle can short on the next.
Use a repeatable inspection routine. Check fill and weight against the calculated shot, look for flash at the parting line, note sink marks on thick sections, find the weld line where two flow fronts meet, watch for flow marks, warpage, bubbles, burn marks at the end of fill, and ejector marks. Then measure critical dimensions with calipers and record them.
Short shots point to insufficient melt temperature, injection pressure, or venting. Flash means the mold is not closing evenly or clamp force is too low for the projected area. Sink marks come from too little packing or from thick sections in the design. Warpage follows uneven cooling and uneven wall thickness.
If a dimension drifts across shots, the problem is process consistency, not the design. More on that in the guide to mold flash causes and fixes.
7. Tune the cycle and cool the part correctly
Change one variable at a time, in small documented increments, and give it at least ten shots before judging. Raise melt temperature in steps of 5 C, raise mold temperature in steps of 5 C, then adjust hold pressure in steps of five percent of injection pressure, then holding time by a second at a time.
Mold temperature is usually more influential than simply adding cooling time. A warmer mold fills thinner walls, releases pressure stress, and reduces the warpage you would otherwise chase by extending the wait. Details on mold temperature control and part quality are covered in mold temperature control best practices.
Cooling typically consumes 50 to 70 percent of the total cycle on small parts, and 10 to 30 seconds is a normal starting window for a compact part. Eject too early and the part comes out soft, distorted, or stuck on its pins; eject too late and you waste the throughput you just gained.
8. Repeat, document, and scale up carefully
Keep a log with one row per shot: material lot, drying time and temperature, barrel zone setpoints, melt temperature, injection and hold pressure, hold time, cooling time, cycle time, part weight, defect observations, and key dimensions. After twenty rows, the pattern in your data is usually obvious in a way that intuition never is.
Repeated acceptable parts are what justify a short run of tens to hundreds, not a single good sample. Once the process window is stable, the natural next steps are multi-cavity tooling and better cooling, and that is exactly where home setups start to exceed their limits.
Move to a larger machine or a professional mold maker when parts carry a safety or regulatory role, when tolerances tighten beyond roughly plus or minus 0.005 inch on a critical dimension, or when you need hundreds of parts per month. The honest comparison at that point is a low-volume service bureau, not your weekend.
Common Mistakes
Nearly every frustrating home molding session comes down to one of these, and each has a cheap fix.
- Wrong polymer. Most home failures come from molding material that was never rated for injection molding. Check the resin grade, not just the color.
- Undried hygroscopic resin. Splay, bubbles, and brittle edges almost always trace back to moisture. Dry it properly and store it sealed with desiccant.
- Insufficient venting. Trapped air shows up as bubbles, burn marks, and short shots at the end of fill. Vents are not optional detail work; they are geometry.
- Poor gate placement. A gate that forces the melt to wrap around the part creates weld lines and trapped gas. Place it so flow is balanced and the last air to escape has a path out.
- Excessive melt temperature. Overheating degrades the polymer, raises fume, and burns the end of the flow. Add heat only when short shots justify it.
- Excessive packing pressure. Too much hold force causes flash, residual stress, and warpage. Reduce hold pressure before you add clamping force.
- Premature ejection. Pulling the part before it has cooled enough causes distortion and marks on the next cycle. Extend cooling before anything else.
- Inconsistent mold temperature. A cold mold makes the same part twice differently. Measure it independently and let it stabilize before each run.
- Unsafe setup. A molder on a kitchen counter, near flammables, with no fume extraction, or where a child can reach it is a setup you should not run.
- Judging quality from one sample. One part tells you almost nothing. Run twenty and inspect ten before you change a setting or celebrate.
Three habits keep home molding safe and repeatable: log every shot, change one variable at a time, and cool the machine down fully before touching the nozzle area. People who do all three get consistent parts within weeks; people who do not are still chasing the same defect a year later.
Frequently Asked Questions
Is it possible to do injection molding at home?
Yes. Desktop and benchtop injection molding machines are made for garage and small workshop use, with shot sizes measured in tens of grams and clamp forces from a few tons up to roughly a hundred. The realistic home part is a clip, cap, spacer, or housing. Precision, safety-critical, and high-volume parts belong in a professional shop.
Can you 3D print a mold for injection molding?
Only in high-temperature resin printed on an SLA or DLP machine. FDM prints soften at melt temperature and delaminate under clamp load, so they fail quickly and unpredictably. Printed tooling resin usually gives tens to a few hundred shots before the cavity or gate wears. Machined aluminum outlasts it by orders of magnitude.
What is the best material for injection molding at home for a beginner?
Polypropylene is the usual recommendation because it is forgiving, low in moisture sensitivity, and melts in a reachable temperature band. High-density polyethylene is close behind. Both shrink around two percent and tolerate small processing mistakes. Avoid polycarbonate and nylon at first; they are hygroscopic and demand a proper dry box.
Can I make my own plastic injection molding machine?
You can build one, and hobbyists have, but expect real limits. Hand-built injectors commonly suffer from plunger leakage and inconsistent shot weight, which is the main reason parts vary. Most people who want repeatable parts end up buying a rated desktop machine and spending the saved effort on mold design and process control instead.
What causes the most common defects in home injection molding?
Short shots, flash, and warpage cover most of it. Short shots come from low melt temperature, low injection pressure, or poor venting. Flash comes from uneven mold closure or too little clamping force for the projected area. Warpage comes from uneven cooling and uneven wall thickness, and mold temperature control usually fixes it faster than extra cooling time.
How many times can a home injection mold be used?
It depends entirely on how the mold was made. Machined aluminum molds run for tens of thousands of shots, sometimes hundreds of thousands. Printed high-temperature resin molds typically last tens to a few hundred shots. High-temperature silicone molds may manage only 10 to 20 before tearing. Plan the mold method around the number of parts you actually need.
Conclusion
Start small and start safe: choose a simple part, confirm your shot size and clamping force actually cover it, pick polypropylene or HDPE, dry anything hygroscopic, and install a properly engineered mold with real vents and draft. Then run one controlled cycle, log it, and inspect twenty shots before changing anything.
Home injection molding rewards patience more than spending. When the part becomes load-bearing, medical, food-contact, or high-volume, hand it to a professional shop and an experienced mold maker — that is the point where their equipment and tooling pay for themselves.