
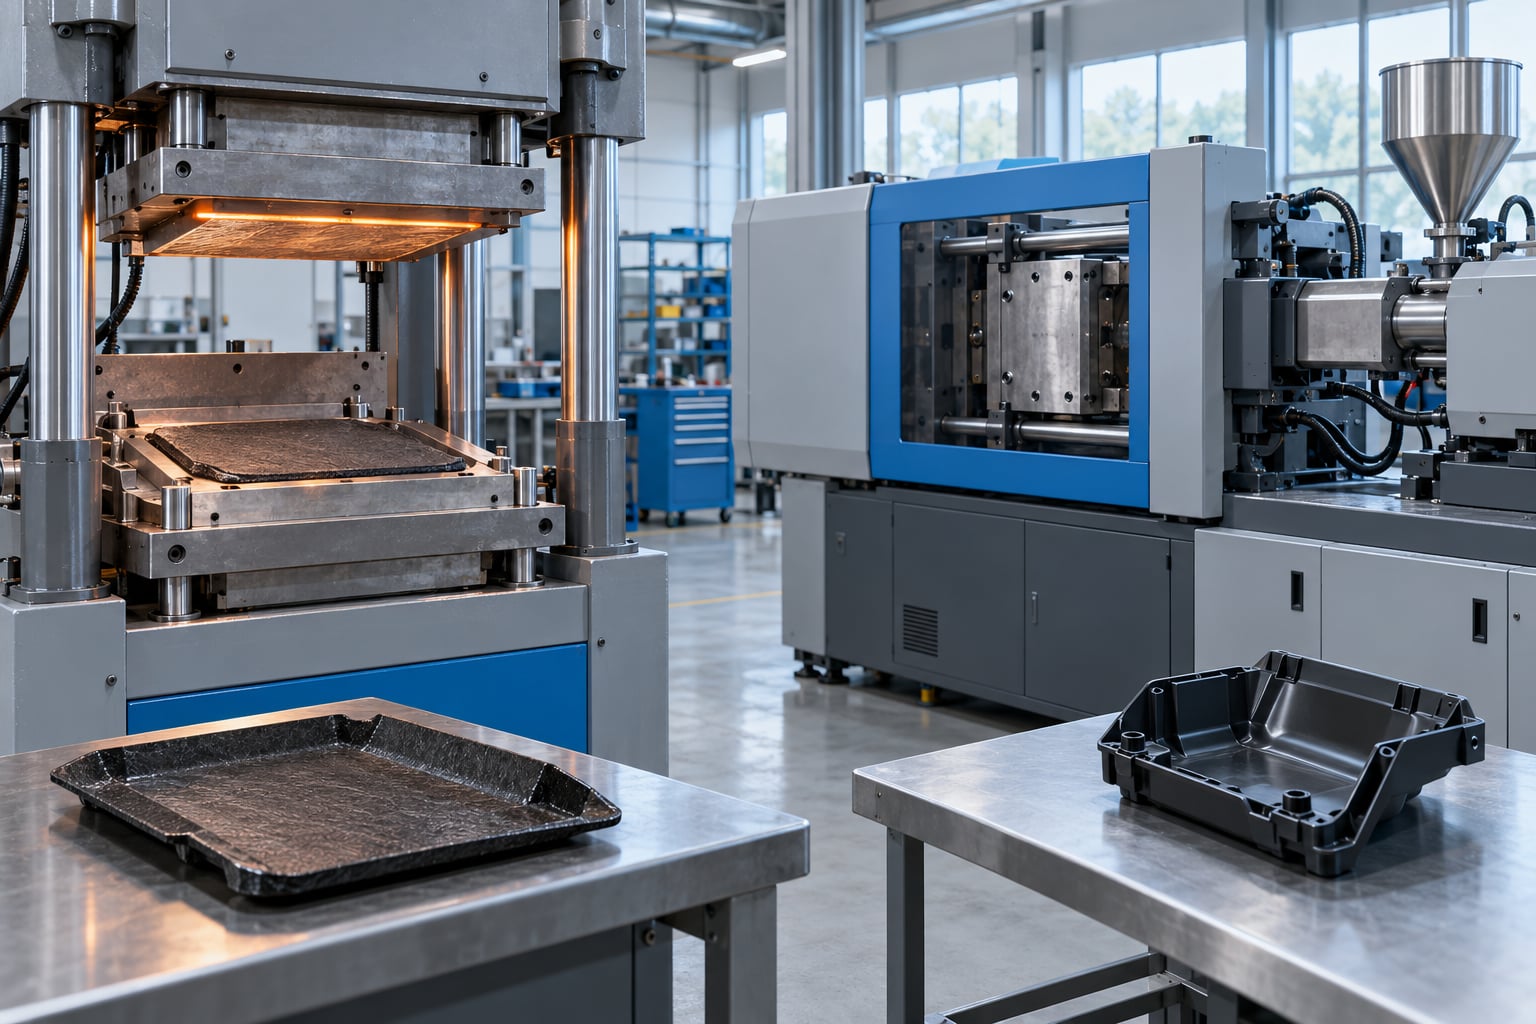
Compression molding and injection molding differ most in how the material reaches the cavity. Compression molding closes a heated mold on a preheated charge and lets pressure and heat fill the shape, while injection molding melts pellets in a screw, forces the melt through a gate into a closed mold, then holds, cools and ejects. Choose compression molding for thermosets, composites, silicone and large thick parts. Choose injection molding for thermoplastics, thin complex geometry and high volumes.
The wrong pick is expensive. It is usually the process that decides your tooling bill, your scrap rate and whether the part is even economical at the volume you need.
This guide compares compression molding vs injection molding the way an engineer would: material behavior, tooling, cycle time, geometry, tolerance and cost per part. It also covers transfer molding and injection-compression, which sometimes win where neither of the main two processes is a clean fit.
Table of Contents
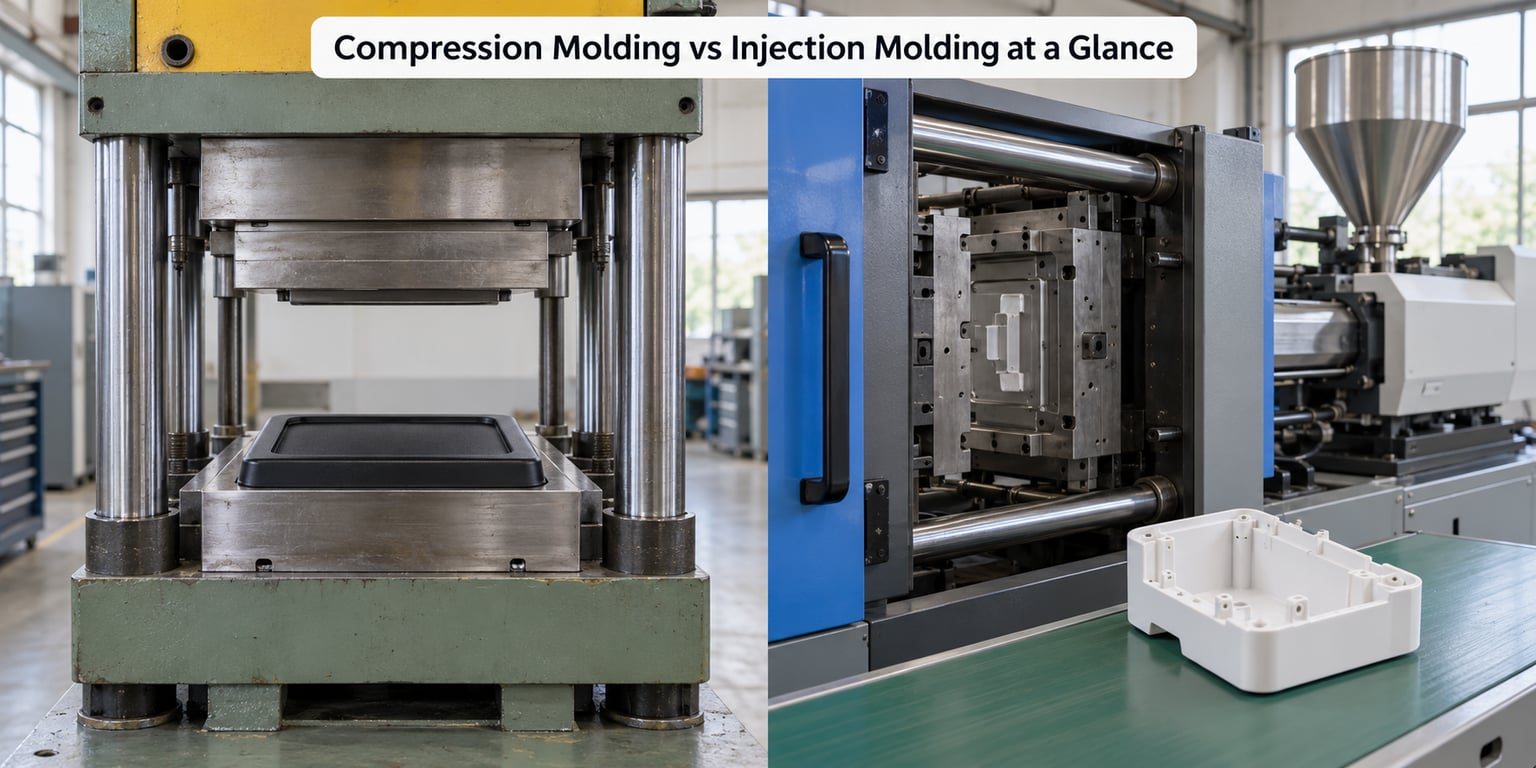
- Compression Molding vs Injection Molding at a Glance
- How Do Compression Molding and Injection Molding Work?
- Materials and Resin Behavior
- Tooling, Cycle Time, and Production Volume
- Part Geometry, Surface Finish, and Quality
- Cost Differences Between Compression and Injection Molding
- Which Should You Choose?
- Choose compression molding when the part is a thermoset, composite or elastomer
- Choose compression molding when the part is large, thick or heavy
- Choose compression molding when the volume is low and tooling budget is tight
- Choose injection molding when the material is a thermoplastic
- Choose injection molding when the part is thin, detailed or has many features
- Choose injection molding when volume is high and cycle time matters
- When neither is the right answer
- Frequently Asked Questions
- What are the key differences between compression molding and injection molding?
- What are the advantages of compression molding?
- What are the disadvantages of compression molding?
- What is the typical tolerance for injection molding?
- How to reduce cycle time in injection molding?
- Can you use an injection mold for compression molding?
- Conclusion
Compression Molding vs Injection Molding at a Glance
| Criterion | Compression Molding | Injection Molding |
|---|---|---|
| How material enters the cavity | Preheated charge placed in an open mold | Melt screw-plasticized and injected through a sprue and runner |
| Pressure direction | From the closing mold halves, all directions | One-directional from the gate |
| Material families | Phenolic, epoxy, polyester, melamine, DAP, silicone, rubber, SMC/BMC/DMC | ABS, polypropylene, polyethylene, polystyrene, nylon, polycarbonate, acrylic, TPU |
| Tooling cost | Lower, simpler tool construction | Higher, more complex tool with hot runner or valve options |
| Cycle time | Typically tens of seconds to a few minutes | Typically single-digit seconds to about a minute for small parts |
| Typical dimensional tolerance | Looser, often around plus or minus 0.01 inch on critical features | Tighter, commonly plus or minus 0.005 inch and tighter with tight tooling |
| Wall thickness | Strong on thick sections, tolerates heavy mass | Best on thin to moderate walls |
| Part size ceiling | Handles large panels and heavy parts | Limited by machine clamping tonnage and shot size |
| Scrap | Low: only the flash trimming from the charge | Runners, runners-plus-rigging and purge material |
| Best production volume | Low to mid volume, or very large single parts | Mid volume through very high volume |
The table is the short version. The details below explain why each row looks the way it does, and where the real decision points sit.
How Do Compression Molding and Injection Molding Work?
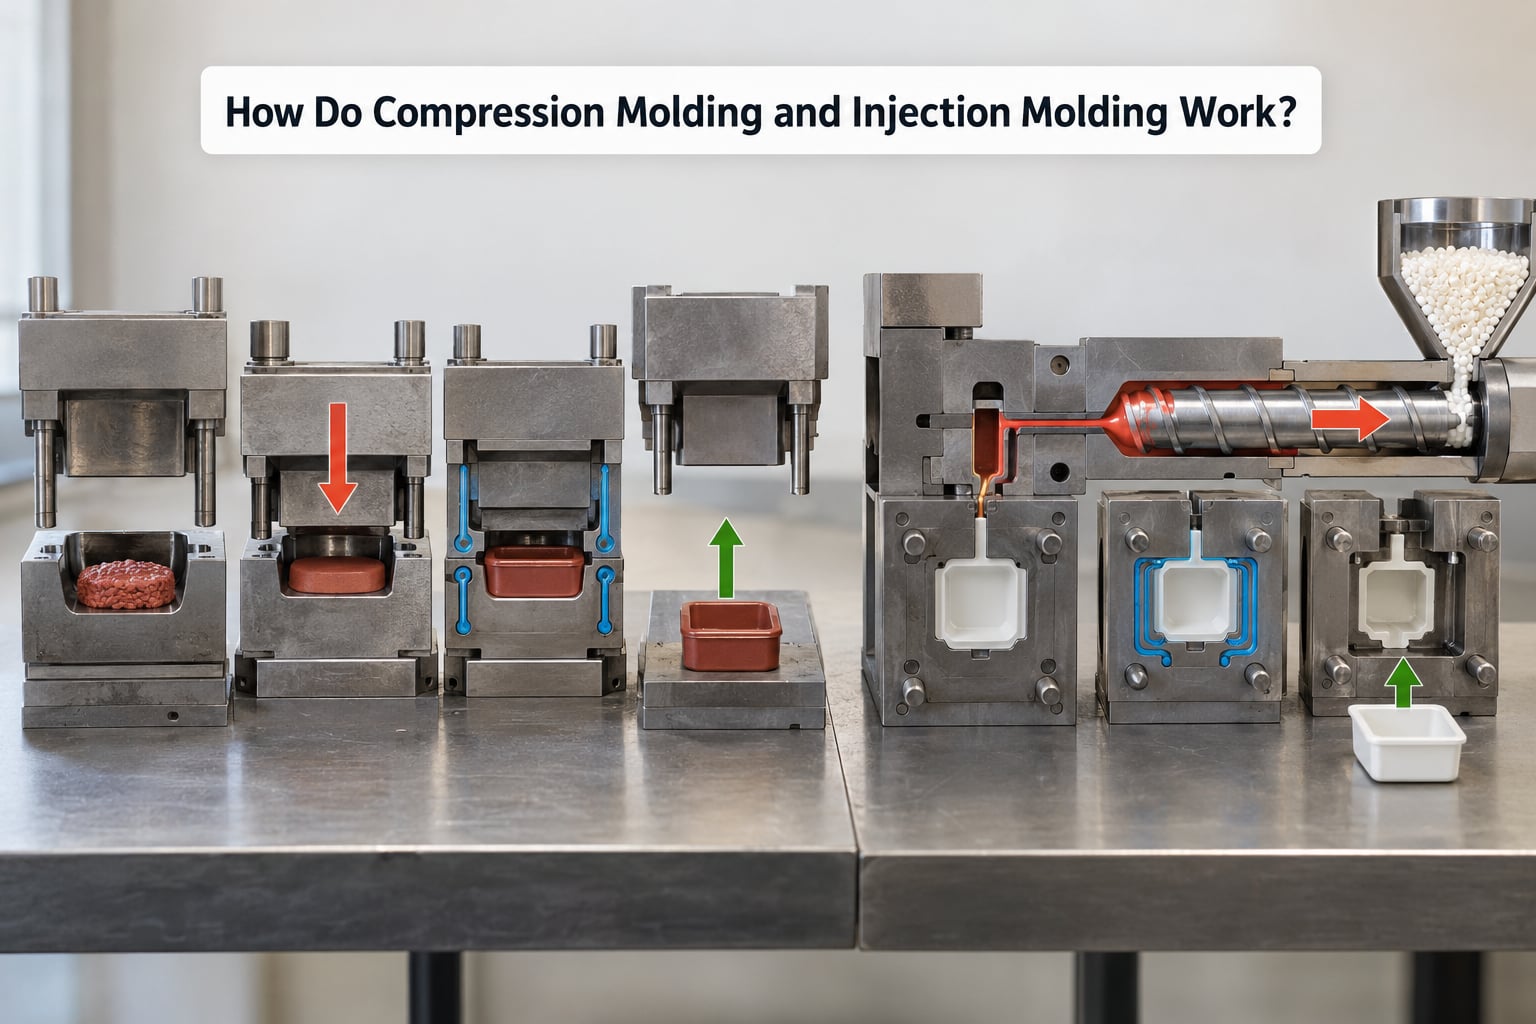
Compression molding in five steps
- A charge of compound is weighed or preform-pressed and set into the open, heated lower cavity. On many presses the charge is preheated first in a separate oven, which shortens the time the resin spends in the mold.
- The upper mold half descends, spreading the charge into the cavity. Pressure rises as the mold closes rather than being applied through a nozzle.
- The material flows, wets out any reinforcement and fills every corner, driven by heat and closing force from multiple directions.
- The resin cures or crosslinks under heat. Thermosets need the full cure cycle and sometimes a post-cure in an oven afterwards.
- The mold opens, the flash is trimmed off the parting line and the part is removed. In multi-cavity tools a part can drop or be lifted out by hand or ejector.
Injection molding in six steps
- Pellets are metered from the hopper, melted and mixed by a rotating screw. Drying of hygroscopic materials like nylon or polycarbonate happens well before this, usually 4 to 24 hours ahead.
- The screw retracts, opening the check ring and filling the barrel ahead of the shot.
- The screw drives forward, injecting melt through the sprue, along the runner and through the gate into the cavity at a controlled fill rate.
- Hold, or pack, pressure is applied to feed shrinkage while the part cools, since thermoplastic volume contracts as it solidifies.
- The part cools in the mold for a set time, then the mold opens and ejector pins push the part out onto a conveyor or into a takeout robot.
- Runners are cut or broken off and the parts move to inspection, assembly or a second operation such as overmolding.
That sequence explains a lot of the practical differences. Injection molding meters material precisely, so scrap is predictable and repeatable. Compression molding lets a person or robot place a charge by hand or by preform press, which is cheap and flexible but adds variation the process has to absorb with pressure and heat.
How these two sit among the main molding types
| Type | How it fills | Where it fits |
|---|---|---|
| Compression molding | Charge collapsed by a closing heated mold | Thermosets, composites, silicone, rubber, large thick parts |
| Injection molding | Molten resin driven through a gate by a screw | Thermoplastics, thin complex parts, high volume |
| Transfer molding | Charge melted in a pot, then pushed by a plunger into a closed mold | Thermosets needing better detail than compression, with high-pressure transfer |
Transfer molding sits between the two. It uses a thermoset charge but meters it under pressure like injection molding, so it costs more in tooling than compression while holding thermoset materials it would otherwise smear.
Materials and Resin Behavior
The material usually decides the process before geometry or volume does.
Thermosets and compound formats
A thermoset cannot be melted and re-melted. Once crosslinked it stays cured, so the resin must be shaped while it is still flowing. That rules out the melt-and-screw mechanics of injection molding for neat phenolic, epoxy, polyester, melamine and DAP resin, which is why compression molding grew up around electrical parts.
Then there are the molding compounds: SMC is a sheet of resin with chopped fiber, BMC is the same idea as a bulk mass, and DMC is a putty-like charge. All three are compression molded. A charge weight for a structural automotive underbody shield can be tens of pounds, which is only practical because the material never has to flow through a nozzle.
Silicone and rubber follow similar logic. Cure chemistry and filler loading control flow, so the mold is heated and the charge is placed, not injected.
Thermoplastics
Thermoplastics soften on heating and can be melted repeatedly, which is exactly what a screw does well. The common names that dominate injection molding are ABS, polypropylene, polyethylene, polystyrene, nylon, polycarbonate, acrylic and TPU.
There are exceptions worth knowing. Polyphenylene sulfide and liquid crystal polymers can be compression molded because of their very high melt viscosity and filler content. And a soft thermoplastic such as TPU can be compression molded or injection-compression molded for optical clarity.
Fillers, reinforcement and color
Reinforcement changes flow direction. Compression molding squeezes fiber from all sides at once, so fiber orientation is less directional than in a one-directional injection flow. Injection molding produces well-defined fiber orientation along flow paths, which is predictable in design but produces anisotropy, meaning properties differ along and across the flow direction.
Compression molding wins on color: pigments go into the compound before molding, so there is no masterbatch ratio to hold and no streaking from poor mixing. Injection molding concentrates color in the screw, where a feeder controls dosage. That concentration can cause color streaking if the screw barrel temperature profile is off.
Tooling, Cycle Time, and Production Volume
Tooling is the line item that decides most projects.
What tooling looks like in practice
Compression tooling is simpler. It is heated platens, one or two cavity inserts, and a mold that moves vertically to close. There is no screw, no barrel, no nozzle and often no runner system at all, because material never travels through the tool. Add the platen size needed for a large part and the result is still usually simpler and less expensive to build than injection tooling of similar part size.
Injection tooling is more demanding. The hot side is a precision assembly: screw, barrel, nozzle, heater bands and thermocouples; the cold side is a two-plate mold with cavities, cores, cooling channels, ejector pins and often a hot runner or valve gate. Cooling channels alone take time and money, because they have to follow the wall of the part without weakening it.
Related cost questions come up constantly in this space. Our guide on how to calculate injection molding tooling cost walks through what drives a quote. It also covers why small design changes late in the build mean a new cavity insert, which is the cost shock most first-time buyers hit.
Cycle time by part size
| Part | Compression molding | Injection molding |
|---|---|---|
| Small component under an ounce | Not usually economical | Often 5 to 20 seconds |
| Handheld device housing | Rarely used | Often 20 to 45 seconds |
| Automotive underbody shield or battery cover | Often 60 to 300 seconds including full cure | Usually impractical at this size and mass |
| Optical lens or clear medical part | Often 30 to 120 seconds | Often 20 to 60 seconds |
Compression cycle times look long mostly because they include chemical cure. A thermoset has to crosslink, and that is chemistry plus heat plus time. Injection molding has no such step, which is why short cycles alone can make an injection cell look cheaper per part.
Where the two processes cross over
Experienced injection molders put the practical crossover somewhere in the low thousands of parts. Below that, neither hard-tooling process is usually the cheapest answer. Above it, injection molding wins on cost per part for thermoplastics. Those figures are heuristics, not a rule, since part size, cavity count and material price all move the crossover.
Compression molding does not have a crossover so much as a ceiling. For SMC composite panels, nobody migrates to injection molding at a certain volume; the part is simply out of range for it. It is also slower to automate. Compression cells do get robotics and multi-cavity tools, but the labor and cycle content is usually higher, which is a real disadvantage in automotive work.
How to reduce cycle time in injection molding
Injection is the easier process to tune, because the screw gives you a handful of levers.
- Cut cooling time first, using faster mold steel or higher-conductivity inserts where the geometry allows.
- Fill hotter. Higher melt and mold temperature can shrink solidification time, though it costs energy control and cycle-to-cycle stability.
- Trim the hold phase to the minimum that still prevents sink marks, rather than running a generous hold by default.
- Move cooling to conformal or core-cooling channels where wall thickness varies.
- Run more cavities or parallel tools so the cell makes more parts in the same time, once the single part is already sound.
Part Geometry, Surface Finish, and Quality
Wall thickness and flow
Compression molding fills from the center outward as the mold closes, so thick sections are easy and long flow fronts are not. Injection molding fills from the gate outward, which handles thin ribs and complex features well but needs even wall thickness to avoid premature cooling and short shots.
This is where the misleading claims come from. Some vendor pages say compression molding handles complex shapes better. That holds only within thermosets and composite charges. In thermoplastics, injection molding builds shapes that would flash and smear in a compression tool.
Flash and parting lines
Every compression part has flash where the charge escapes at the parting line, and someone trims it. Injection parts have runners that also need removal, plus the gate vestige. Compression flash tends to be small and consistent if the charge weight is controlled. The bigger risk in compression molding is a variation in charge weight, which shows up directly as variation in flash thickness and part thickness.
Warpage, sink marks and fiber orientation
Compression molded composites warpage mostly from uneven cooling across thick, fiber-filled sections and from asymmetric fiber distribution. Injection molded parts sink near thick bosses because the pack phase cannot reach them. Fiber orientation in injection parts follows the flow, so a rib perpendicular to the flow direction will not fill the way a rib along the flow will, and the resulting anisotropy can surprise a designer.
Birefringence and optical parts
This is the sharpest quality difference. Injection molding subjects the melt to shear through the gate and nozzle, and that frozen-in stress shows up as birefringence, which is visible as distortion in clear lenses and medical parts. Compression molding applies almost no shear to the charge, so stress is far lower. That is why lens makers run compression or injection-compression instead of straight injection, and why the same parts can look clear in one process and rainbowed in the other.
Repeatability, scrap and inspection
Compression molding gives up repeatability against a molding machine. Charge weight, charge placement and mold temperature vary shot to shot, and that variation lands in flash thickness, fill weight and cure state. Cured thermoset parts need gauging and destructive testing rather than just go/no-go inspection.
Injection molding is process-controlled and logged. Fill, pack and temperature profiles are recorded per shot, so a dimension drifts on one cavity and not another is diagnosable. Runners and channels can be reground and recycled, which is an advantage compression molding does not have since its scrap is a filled or cured material that is harder to reuse.
That is the source of the scrap contradiction floating around vendor blogs. One says compression molding wastes less, the other says more. Both are measuring different things. By mass in the tool, compression molding produces far less waste. By material value lost, it can be worse, because cured phenolic or SMC scrap has no second life. Injection runners are clean thermoplastic and go straight back into regrind.
Failure modes worth putting into a quality plan differ too. Our FMEA for injection molding processes guide covers the defect list for the injection side, including weld lines, air traps, burns and short shots.
Cost Differences Between Compression and Injection Molding
Every cost difference traces back to one of six drivers.
The main cost drivers
Equipment. Injection needs a molding machine with tonnage, a plasticizer and closed-loop controls. Compression needs a heated press, which is simpler and often cheaper per unit of force, though large platens for big parts are substantial iron.
Tooling. Compression tooling is generally the smaller line item. Injection tooling carries the extra cost of cooling, hot runner or valve gate options, and multi-cavity layouts scale the price up fast.
Material. Compression molding consumes exactly the charge weight, so material cost tracks part weight closely. Injection molding consumes the shot plus runners, so per-part material cost is higher, though the thermoplastic grades are usually cheaper per pound than a filled thermoset compound.
Cycle time and labor. A compression press runs slower and usually needs more operator involvement in charging and de-flashing. An injection cell runs unattended once started. At high volume that labor and cycle difference usually outweighs the scrap difference.
Secondary operations. Compression parts need flash trimmed and often a post-cure. Injection parts need gate removal and sometimes overmolding. Both need the same secondary work if the design calls for paint, printing or assembly.
Scrap rate. Low-volume compression work often carries a higher scrap rate because small batches include setup rejects and first-article parts. High-volume injection cells hold scrap consistently low because the process is stable.
If you are weighing a third process at the same time, thermoforming vs injection molding cost comparison covers the large thin sheet case that neither molding process suits well.
A worked cost-per-part example
Take a housing for an electrical component, roughly 180 grams in molded material, with a required run of 8,000 parts a year for three years, so 24,000 parts total.
Injection molding route. Higher tooling cost up front, spread over 24,000 parts. Fast cycle, low labor, runner scrap recovered as regrind. Material cost per part carries the runner allowance. Total per-part cost is moderate and stable.
Compression molding route. Lower tooling cost. But the part has thin features and a thermoplastic housing material, so the design fights the process: thicker walls, draft on every face, flash that needs trimming, and a cycle two to four times longer. If the cycle gets long enough to force a second press or extra labor, the per-part cost converges on the injection route or passes it without ever hitting the low-volume advantage. The break-even point is where the fixed tooling saving is spent on cycle and labor.
Now change one variable and the answer flips. Make the part a 10 pound SMC underbody shield with a run of 30,000 a year. Injection molding is not a candidate at that mass and size, so the break-even question disappears. The real lesson is that break-even is not a chart you look up; it is arithmetic on your own part’s mass, cycle time, cavity count and annual volume.
Below the practical crossover, ask about soft tooling, CNC-machined prototypes and short-run 3D printing before committing to hard tooling. Above it, injection molding usually wins for thermoplastics. Between them, in the low thousands of parts, molders often recommend prototyping first and committing to hard tooling only after a real demand curve is visible.
Which Should You Choose?
Choose compression molding when the part is a thermoset, composite or elastomer
If the material is phenolic, epoxy, polyester, melamine, DAP, SMC, BMC, DMC, silicone or rubber, compression molding is usually the default. These materials either cannot be melted and re-melted or flow far too poorly for a screw to meter them.
Choose compression molding when the part is large, thick or heavy
Large panels, structural shields, battery casings and heavy electrical insulators fit here. The charge sits in the cavity as a solid mass instead of having to travel through a narrow gate, and the closing mold applies pressure from all directions.
Choose compression molding when the volume is low and tooling budget is tight
Compression tooling is cheaper to build, and one simple single-cavity press tool can cover small runs and prototypes. If the volume is genuinely uncertain, the lower tooling commitment is worth a lot of risk reduction.
Choose injection molding when the material is a thermoplastic
ABS, polypropylene, polyethylene, polystyrene, nylon, polycarbonate and acrylic all mold best in a screw machine. The material is metered to a set weight every cycle and the process repeats to a tight tolerance.
Choose injection molding when the part is thin, detailed or has many features
Ribs, snap fits, threads, draft-free cosmetic surfaces and long flow paths are injection molding territory. Holding pressure also controls sink marks in a way a compression press cannot, which matters for any visible face.
Choose injection molding when volume is high and cycle time matters
Once you are past a few thousand parts a year for a thermoplastic part, injection molding generally gives the lower cost per part. It also automates cleanly, which matters when labor is your second-largest cost.
When neither is the right answer
Two adjacent processes cover the gaps. Transfer molding handles thermosets that need sharper detail than compression molding can give. Injection-compression molding handles optical lenses and clear medical parts where straight injection would freeze in stress and cause birefringence.
Hybrid designs exist too. A common pattern is an injection-molded insert placed in a compression mold and overmolded in thermoset, which gets you complex geometry and material cost advantages in one part.
One question comes up often enough to answer here: can an injection mold be run as a compression mold? It can, in principle, with an added charge plate or preform station, since the cavity geometry is the same. But flash control, charge weight control and cure behavior all change, and the hot runner becomes dead weight. Most shops treat it as a bridging technique for prototypes rather than production.
Frequently Asked Questions
What are the key differences between compression molding and injection molding?
Compression molding closes a heated mold on a preheated charge, so pressure comes from the mold halves in every direction and only flash is trimmed off. Injection molding melts pellets in a screw and forces the melt through a gate into a closed mold under high pressure, then holds, cools and ejects the part, leaving runners to remove. That difference drives tooling cost, cycle time, tolerance, material choice and scrap rate.
What are the advantages of compression molding?
Compression molding uses far less material because only the flash is trimmed, and that flash is a small part of the charge. It applies pressure from all directions at once, so fiber and resin orient more evenly than in a one-directional injection flow. Tooling is simpler and cheaper, it handles large and heavy parts injection cannot, and it produces very low internal stress, which makes it the process of choice for optical lenses.
What are the disadvantages of compression molding?
Cycle times are longer because thermoset cure is chemistry plus heat plus time, and post-cure may be needed. Dimensional repeatability is looser than injection molding because charge weight, placement and mold temperature vary. Flash must be trimmed on every part, cure state means gauging and destructive testing instead of simple go/no-go inspection, and automation is slower to justify.
What is the typical tolerance for injection molding?
Standard injection molding commonly holds about plus or minus 0.005 inch on general features, with tight tolerance molds reaching plus or minus 0.002 inch on critical dimensions. Achievable limits depend on part size, shrinkage rate, material grade and how uniform the wall thickness is. Compression molding is normally looser, often around plus or minus 0.01 inch on features that matter.
How to reduce cycle time in injection molding?
Cut cooling time first with faster mold steel or core cooling where the geometry allows. Fill and hold hotter to shorten solidification, trim hold pressure to the minimum that still prevents sink marks, add cooling channels to thin walls that are running hot, and increase cavity count or run parallel tools once a single part is already sound. Reducing material weight and cycle-to-cycle variation pays off too.
Can you use an injection mold for compression molding?
Sometimes. The cavity geometry is the same, so an injection tool can be adapted with a charge plate or preform station to run as a compression tool for prototypes and small batches. Flash control, charge weight control and cure behavior all change, and the hot runner serves no purpose. For sustained production, dedicated compression tooling is the better investment.
Conclusion
The decision rule is short. If the material is a thermoset, composite or elastomer, or the part is large and thick, compression molding usually wins. If the material is a thermoplastic or the part is thin, detailed and produced in volume, injection molding usually wins.
Evaluate five things in order before you commit tooling money: the resin family, the part geometry, the annual volume, the tooling budget and the quality requirements. Start with the material, because it removes half the options immediately.
Before hard tooling, prototype in soft tooling or short-run printing so you learn your part’s real cycle time and real demand. That one step prevents most of the expensive surprises in either process.