
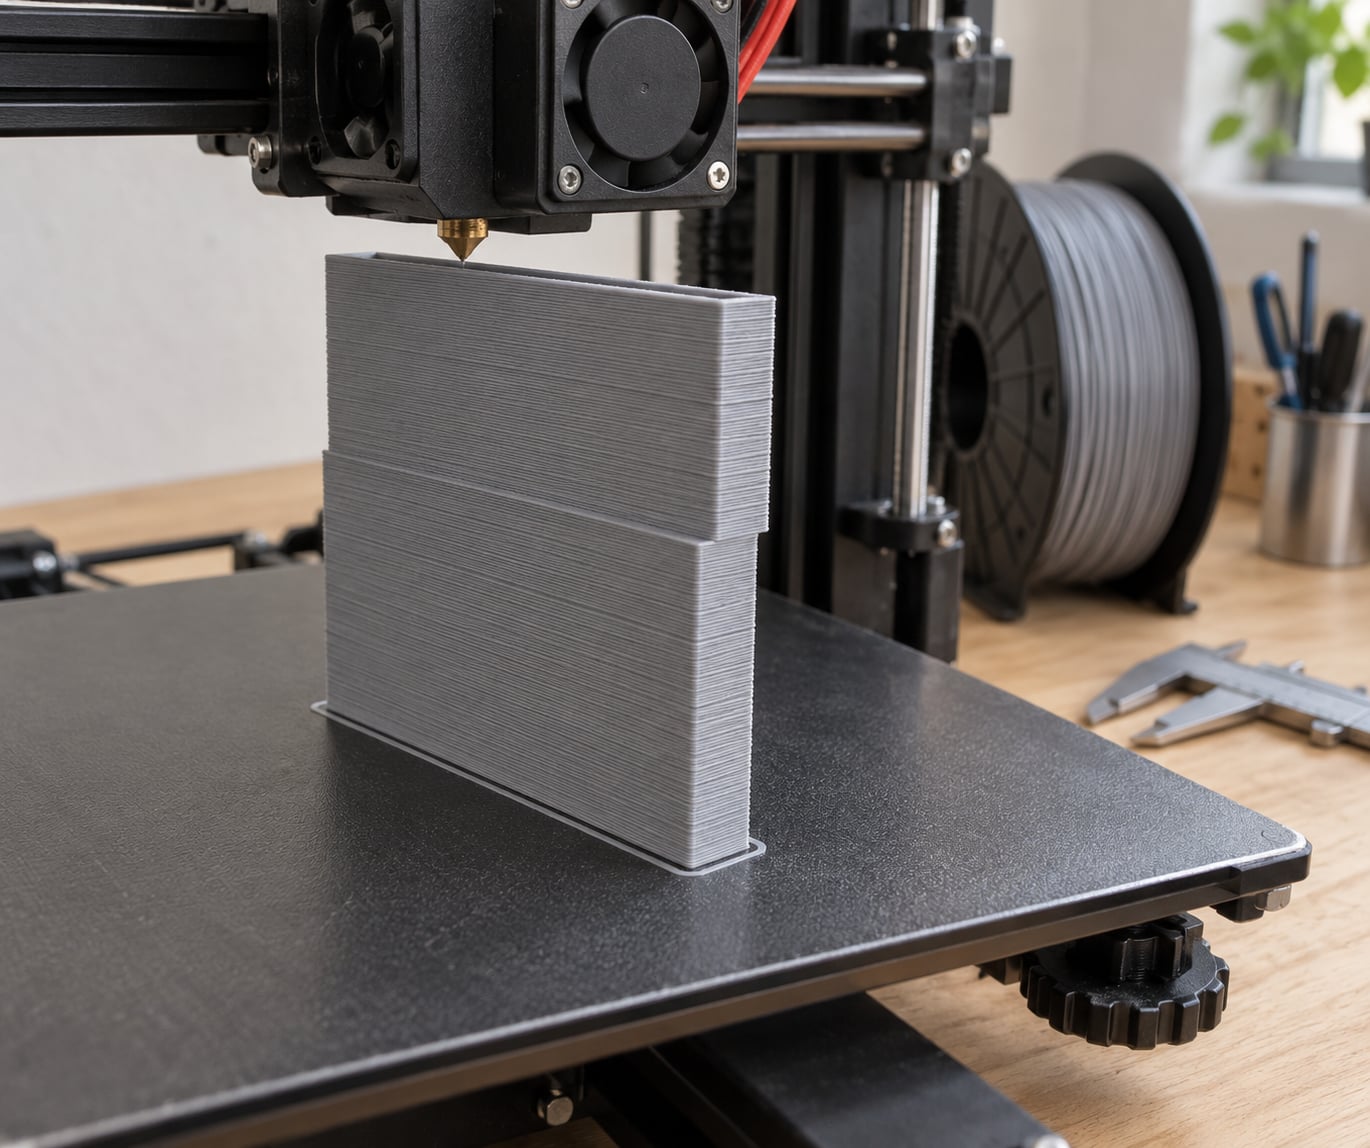
Layer shifting is a motion fault where one layer suddenly steps sideways in X or Y, so every layer above it prints in the wrong place. It shows up as a clean staircase edge partway up a wall, usually after a grinding noise you ignored. The good news: the defect is almost never a slicer problem, and the causes of layer shifting in 3D printing fall into a short, checkable list.
Below I walk through eight causes ranked by how often they turn out to be the real culprit, plus a diagnostic order that tells you which one to chase first. It matters whether you run hobby FDM machines or resin printers, because the fix for a loose pulley and the fix for a contaminated build plate have nothing in common.
Table of Contents
- What Is Layer Shifting in 3D Printing?
- Layer Shifting in 3D Printing: 8 Main Causes
- 1. Build plate not properly secured
- 2. First-layer adhesion is too weak
- 3. Temperature changes cause uneven contraction
- 4. Filament or resin is absorbing moisture
- 5. Extruder tension, feed, or nozzle pressure is inconsistent
- 6. Print speed or acceleration exceeds machine capability
- 7. Z-axis, belts, lead screws, or frame components are loose
- 8. Incorrect layer height, flow, or slicing settings
- How to Diagnose the Actual Cause
- How to Fix Layer Shifting in FDM Printing
- How to Prevent Layer Shifting in SLA and Resin Printing
- When to Stop and Inspect the Machine
- Frequently Asked Questions
- Why does my 3D print keep shifting layers?
- What are the most common causes of layer shifting?
- Why do my 3D prints shift layers at the same height every time?
- How do I tell the difference between a layer shift and a layer drift?
- Will increasing the motor current fix a layer shift?
- Is layer shifting a slicer problem or a mechanical problem?
- Conclusion
What Is Layer Shifting in 3D Printing?
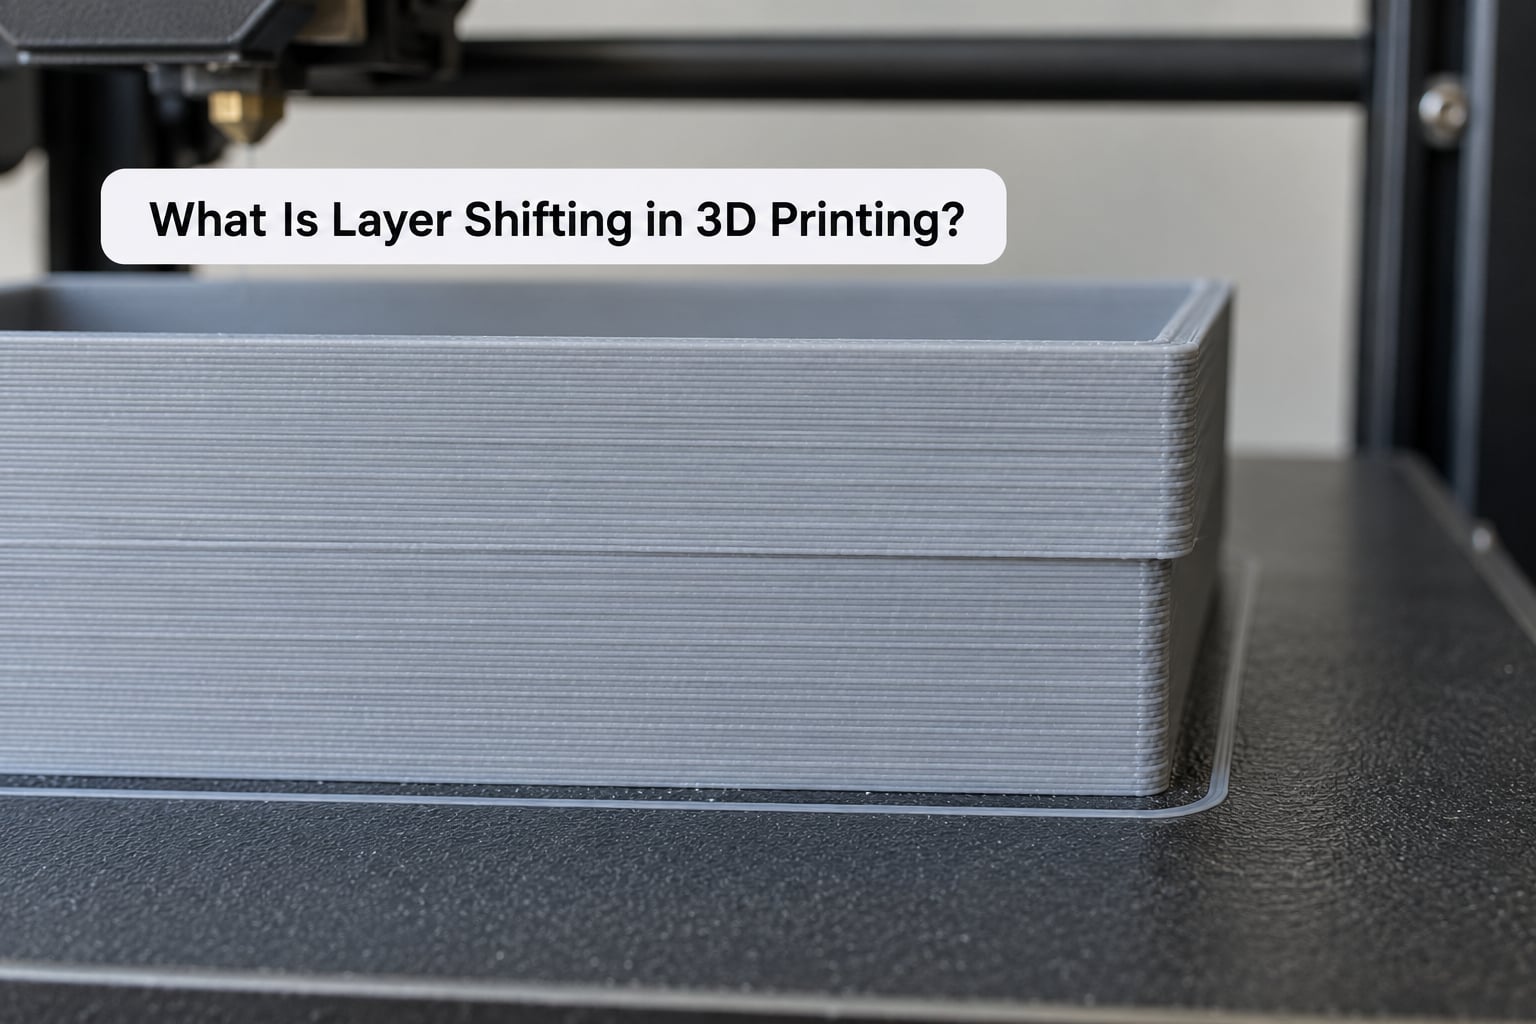
Layer shifting in 3D printing is a motion fault in which one or more layers abruptly step sideways in X or Y, leaving everything printed after that height offset from what came before. The signature is a sharp lateral jump — the staircase effect — rather than a gradual lean.
It happens because most desktop printers run open-loop motion control. The controller tells a stepper motor to move a set number of steps, then assumes it did. There is no sensor at the far end of the axis confirming the carriage arrived. If a collision, a slipping pulley, binding friction or a thermally throttled driver prevents the move, the motor loses steps, the firmware never notices, and printing carries on from a position that is now wrong.
That is also why the printer cannot self-correct. Once the position error exists in the controller’s mind, every subsequent toolpath offset carries the same error forward until the job ends.
What the defect looks like
Before you change anything, photograph the part and record four details: the Z height where the shift starts, which direction the step goes, whether the offset is one-sided or both, and whether you heard anything at that moment. A grinding or clicking noise right at the shift height is the single most useful clue you can capture.
Layer shift is not the same as warping, cracking, delamination, ringing or Z-banding. Those defects all get described as “the layers are off,” so telling them apart first saves hours of chasing the wrong thing. If the part separates from the bed or the layers split apart from each other, that is an adhesion and bonding problem, not a motion fault — and the two have opposite fixes.
For context on why material choice matters as much as machine condition, our guide on what causes brittleness in plastic parts covers the thermal and formulation side that shows up as cracking rather than shifting.
Layer Shifting in 3D Printing: 8 Main Causes
The visible step is a symptom, not a cause. Underneath it you will find one of five families of problems: something in the machine physically moved, something expanded or contracted unevenly, the material itself is compromised, the part is not held to the build surface, or the slicer is asking for more than the hardware can deliver.
Here they are in the order I would check them, most common first. Most layer shifts trace back to the first three causes on this list.
1. Build plate not properly secured
A build surface that moves is the simplest explanation and the easiest to test. On FDM machines, an unleveled or loosely clamped sheet, a warped plate, or a contaminated glass surface lets the part creep during the first few layers. By layer 30 the part has slid a fraction of a millimetre and the wall steps.
Check it by loosening the plate clamps, pressing firmly on the centre of the sheet, and watching whether it rocks. Then look for oil, fingerprint grease, glue residue or release agent on the surface — a slick plate cannot hold a part through a full print. Re-level with a paper drag test, tighten every clamp or screw evenly, and re-trim the sheet if it is visibly curled.
Resin printers are the same problem with different parts. The build platform must seat flat against the tilt screws and the vat lip, and the tilt springs or shims must be equal on all four corners. A platform that sits slightly tilted starts printing fine and then loses suction, which is covered in the resin section below.
2. First-layer adhesion is too weak
Bed adhesion problems cause layer shifting indirectly. A part that is not stuck down is a part that can be nudged, and anything that touches it — the nozzle on a travel move, a warped corner lifting up, the wipe or purge line — pushes it sideways.
The usual triggers are a nozzle sitting too high (Z offset set above the correct gap), a nozzle too low and dragging a bead that shoves the part across, a dirty or textured surface, and bed temperature set too low for the material. ABS and ASA need a hot bed; PETG needs a clean textured surface and often a brim; PLA on bare glass will usually hold on its own.
Test adhesion directly: print a small single-layer square, then try to slide it with a fingernail. If it moves, that is your answer before the first full print ever starts. Fix adhesion, then re-run the diagnostic — do not tune motion settings against a part that is already loose.
3. Temperature changes cause uneven contraction
Anything printed hot and then cooling while still under load will move. A tall ABS or ASA tower contracts as it cools, and if the bottom of the part is held by bed adhesion while the top is free, the difference between the two shows up as a lean, a twist, or — once the stress gets big enough — a sudden lateral step.
The amplifier here is a hotend and a bed set far apart in temperature with a cool room around them, or a heated chamber set for high-shrinkage materials with draft shielding. A part that starts at 100 °C on the bed and quickly falls toward room temperature has a lot of contraction to absorb.
Reduce the gradient rather than the temperature. Raise bed temperature to within about 10 °C of the nozzle for ABS and ASA, keep the chamber steady, close doors and curtains, and check that no fan is blowing across the build area. On a cold machine in a cold room, a simple enclosure makes a bigger difference than any slicer change.
4. Filament or resin is absorbing moisture
Hygroscopic filaments — nylon, PETG, TPU, PC and to a lesser degree ABS — take on water from humid air. That moisture turns into steam at the nozzle, bubbles appear in the deposited line, and the layer stops bonding properly. Bubbles also make the deposited bead wider and softer, so the nozzle can drag and push a layer rather than place it.
Signs of wet filament: popping or crackling during extrusion, visible bubbles in the deposited bead, stringing that looks like fine mist, and parts that look rough on the surface while the slicer preview looked clean. A coarse stringy surface on a filament that used to be smooth is a strong tell.
Dry the spool before blaming the machine. Most filaments want 60 to 70 °C for four to six hours in a dryer, and the number printed on the spool wins over any generic range. Store spools in sealed bags with desiccant, and keep them in the same dry box the dryer uses. If a spool stays rough after drying, replace it — a compromised filament wastes more time than it costs.
For resin, the equivalent is a contaminated vat. Skin, dust or debris floating on the surface gets cured into the bottom of the print and changes how the part releases, which can knock it off centre.
5. Extruder tension, feed, or nozzle pressure is inconsistent
A printer can lose position in the middle of a layer for reasons that have nothing to do with the gantry. If the extruder is under-driven, filament grinds against the drive gear and the axis decelerates as the motor fights to push material. Over-driven, the same gear bites so hard it stalls the stepper mid-layer. Either way the toolpath is executed with a lag that compounds.
Signs: visible filament chew marks and shiny flattened sections on the filament just above the gear, a drive gear with flattened or missing teeth, or a nozzle that has partially blocked and is now backing up pressure. A clogged or partially blocked nozzle also shifts pressure in the melt zone, which shows up as inconsistent line width and weak layer bonding — closer to a bonding defect but often diagnosed as shifting.
Check the idler pressure so the filament is firmly engaged without the gear digging into it, inspect the gear teeth under magnification, and clear the nozzle with a proper needle or a cold pull. A gear that has chewed through its teeth is a replacement, not an adjustment.
6. Print speed or acceleration exceeds machine capability
Stepper motors have a finite torque margin. Exceed it and they lose steps, so a speed profile that flies through a long straight acceleration can move the axis further than the motor physically delivered. Small feature geometry, long perimeter moves and sharp direction changes are where it shows up first.
The symptom is a shift that appears on fast, well-tuned prints and disappears when you drop speed. Ender 3 class bedslingers with a heavy bed, tall prints, and speed squares are the classic combination. Prints after a crash or a machine that has been re-tensioned differently often shift under the same profile that used to work.
Halve print speed and acceleration, or set them explicitly in your slicer rather than relying on the printer’s defaults. If the shift disappears, you have a torque problem and can raise the limits one at a time until it returns — that gives you the machine’s real ceiling instead of a guessed one. On a CoreXY machine the visible shift direction does not isolate one belt, since both motors drive both axes, so a shift on X can originate anywhere in the coupled belt path.
7. Z-axis, belts, lead screws, or frame components are loose
This is the family most guides treat as a single “check belt tension” instruction, and it is why so many people fix nothing. Loosiness comes from several places and they are not interchangeable.
A loose GT2 belt skips teeth under load. A pulley whose grub screw has backed off or is not seated on the shaft flat lets the pulley rotate without the motor — and this is the failure users describe as hardest to see, because nothing looks broken. An eccentric coupler that has loosened lets the leadscrew turn without moving the bed. Worn V-rollers, a dry or contaminated linear rail, a cable harness that catches at one point in the travel, and a bowed frame all produce resistance the motor can stall against.
Test rather than guess. Power the machine off and move the carriage by hand along each axis; it should glide with a consistent, almost weightless feel, and any spot where it grabs or the direction of travel changes is a real obstruction. Run each axis to both ends of travel and back repeatedly — a cable snag announces itself at a consistent position. For belts, the acceptance test is whether the axis tracks cleanly and reverses repeatedly without losing position, not whether it meets some universal tension number, because tension specs and belt profiles differ by machine.
Be careful in the other direction too: users frequently report that tightening a sagging belt further caused more layer shifts and more grinding. Over-tensioned bearings raise friction, which raises the torque the motor needs, which costs steps.
Z-axis faults add a second signature. A lead screw with a dry or bent coupler, a worn anti-backlash nut, or a loose top bearing produces Z-wobble or a lead screw pitch error — a wave with roughly 8 mm spacing on a T8 screw — rather than a flat staircase. Check the coupler first; it is a two-minute check and a common culprit after reassembly.
8. Incorrect layer height, flow, or slicing settings
The last item on the list is the one most people try first, and it is genuinely last. Slicer settings can weaken a layer enough that it looks like shifting, but they do not move the gantry.
Layer height above your nozzle’s practical capability, an extreme flow multiplier, or a first layer printed with a line width the nozzle cannot sustain will all produce a part that tears and separates. Too many perimeters on an undersized nozzle, an aggressive seam position crossing thin walls, and cooling set too high for the bridge or overhang will weaken specific bands. The result reads as “the layers moved” when really the layer never bonded properly.
Set layer height within the range your nozzle and geometry support, keep flow around the filament supplier’s recommendation, and only adjust these after the mechanical and electrical checks pass. If a calibration XYZ cube prints perfectly while real parts still shift, that is strong evidence the fault is mechanical rather than slicer-related — a useful signal that a lot of people treat as contradictory rather than diagnostic.
How to Diagnose the Actual Cause
Work the sequence in order. It costs an hour and saves a weekend.
- Note where the shift starts. The Z height and direction of the step narrow the suspect list immediately.
- Check whether it repeats at the same height. This single question eliminates half the possibilities.
- Look at the first layer. A loose, smeared or lifted first layer means adhesion, not mechanics.
- Inspect the nozzle and the part. A scar or flat spot on the nozzle tip means it struck something.
- Run a reduced-stress test print at 50 percent speed and reduced acceleration with the same geometry. If the shift disappears, it is a torque or settings problem.
- Power off and hand-test each axis for binding, cable snags and rough spots in the rails.
- Verify temperatures against the material’s requirement and confirm the bed-to-nozzle gap.
- Check material condition by drying the filament or inspecting the resin vat.
- Only then compare slicer settings against the machine’s documented limits.
If the shift happens at exactly the same height on every attempt, stop looking for random mechanical failure. A repeatable event at a fixed height is a collision or a geometry event — a warped corner, a curl, a bumped support, an obstacle in the toolpath, or a design feature that drives the axis to an extreme of its travel. Owners usually assume the model or the sliced file is corrupt, when the model is generally telling the truth about a problem it did not cause. On a mechanically sound machine, re-orienting the model 15 to 30 degrees off parallel to the bed resolves the fault surprisingly often, which points at the geometry rather than the hardware.
| What you see | Most likely cause | First check |
|---|---|---|
| Grinding or clicking from a motor mid-print | Lost steps from insufficient torque | Bindings, pulleys and belt tension |
| Shift at the identical height every print | Collision or repeatable geometry event | Nozzle for scar marks, part for curls |
| Stepped walls with a loud bang, part intact | Nozzle strike on a curled corner or blob | Bed adhesion and the printed part mid-print |
| Shift only on tall or heavy prints | Acceleration exceeds motor torque | Speed and acceleration settings, pulley seating |
| Hot driver board, shift later in long prints | Driver thermal limiting, current set too high | Enclosure airflow and documented current |
| Belt dust, wear flats on a pulley | Tooth wear or tooth jump | Replace the belt and the idler pulley |
| Axis catches at one position, both directions | Cable harness snag | Cable routing and strain relief |
| Layers separate and the part lifts off the bed | Adhesion and bonding failure, not a layer shift | Bed surface, Z offset, bed temperature |
| Wave in the walls at even vertical spacing | Z-wobble from a loose or bent coupler | Z coupler and top bearing |
One note on driver current, because the common advice here is wrong. If current is set too low, the motor loses steps and the printer shifts. If it is set too high, the driver runs hot, hits its own thermal protection, and shuts down mid-move — and that shutdown is itself the skipped step. Never adjust driver current with the machine powered, never touch terminals while energised, and follow your printer’s documentation for the correct value rather than a generic recipe copied from a forum.
How to Fix Layer Shifting in FDM Printing
Once you know the family of cause, this is the order I would work in. Clean the build surface with the material-appropriate cleaner, level the plate, and confirm the Z offset by eye at three points across the bed.
Set temperatures for the specific filament rather than profile defaults, then run a single-layer adhesion square and try to slide it. Tighten the extruder until the filament is firmly engaged without visible flattening, and confirm the idler pressure is not dragging the gear teeth.
Next comes mechanical inspection with the power off: hand-test each axis through its full travel, watch for cable snags at a consistent position, and check every pulley grub screw is seated on the shaft flat and marked with a paint pen. Then set print speed and acceleration explicitly and re-run the test print.
Finish with a repeatability check — three consecutive prints of the same geometry at the corrected settings. One good print proves very little. If you are weighing whether to keep a desktop machine for functional parts or move to a different process, our 3D printing vs injection molding cost breakdown is a useful read once the machine itself is behaving.
How to Prevent Layer Shifting in SLA and Resin Printing
Resin printers fail differently, and FDM terminology does not apply. There are no belts to tension and no stepper torque limits, so the causes are mechanical seating, surface chemistry and peel force.
Platform seating is the equivalent of a loose build plate. The platform must sit flat and level on all four tilt screws with no rock. A tilt that is only slightly out produces a part that prints cleanly and then releases off-centre.
Suction failure looks like the part detaching during the downstroke and sticking to the build plate on the way up. A failed release leaves the part bonded at the edges, and the next layer peels and knocks it out of position. Both cause layer shifting in resin, and both are cured by cleaning the plate surface, checking the tilt, and reviewing the exposure and wait times the resin and printer documentation specifies.
Contamination on the vat film or the plate changes release behaviour until it is cleaned. Keep the film dust-free, keep the plate surface free of cured resin, and revisit the silicone release surface if parts start releasing inconsistently with no other change.
Finally, peel forces scale with cross-sectional area. A part that is fine on a small test cube can shift on a large footprint because the downstroke force is too high for the lift speed. Increase lift speed or reduce the area of the base, and re-orient the model to reduce the footprint.
When to Stop and Inspect the Machine
Some symptoms mean a settings change will waste your time. Stop and inspect the hardware when you see any of these.
- Repeated skipped steps and grinding at the same speed on every attempt, regardless of profile
- A driver board that is too hot to touch shortly after a print starts
- Visible belt dust, flattened teeth on an idler pulley, or a belt that frays at the edge
- An axis that moves with uneven resistance or a distinct catch at one point in travel
- A print that fails within seconds of starting, every time
- Loss of position immediately after a crash, a move, or a pulley or belt replacement
- A persistent scar or flat on the nozzle tip
If the printer still shifts after every mechanical, thermal, material and setting check, the next step is firmware and file integrity rather than more hardware swapping. Re-slice from the model, re-flash or re-check firmware versions, and confirm the file transfers intact. That is a short list and it belongs at the end of the process, not the start.
Frequently Asked Questions
Why does my 3D print keep shifting layers?
Layer shifting in 3D printing happens because the printer lost position during a move and never detected it. Most machines use open-loop motion control, so a stepper motor that stalls or skips steps leaves the controller printing from a location the tool is not actually at. The usual triggers are a loose belt or pulley, binding in the motion path, a nozzle strike, insufficient motor torque at high acceleration, or a driver that thermal-shuts down.
What are the most common causes of layer shifting?
In order of frequency: an unsecured or dirty build plate, weak first-layer adhesion, uneven thermal contraction during cooling, wet or damaged filament, inconsistent extruder tension or feed, print speed and acceleration beyond the machine’s torque, loose belts, pulleys or Z-axis couplers, and finally slicer settings. Most shifts are mechanical or thermal, so work through the first three before changing any profile.
Why do my 3D prints shift layers at the same height every time?
A shift that repeats at an identical height is a repeatable event, not random loss of position. Something at that specific Z height physically interferes: a warped corner lifting off the bed, a curled edge catching the nozzle, a bumped support, or a model feature driving the axis to an extreme of its travel. Check the nozzle for a scar or flat spot and inspect the part mid-print at that height. Random mechanical failures move around; fixed-height failures do not.
How do I tell the difference between a layer shift and a layer drift?
A layer shift is an abrupt, single step sideways, like the staircase effect, and it means the printer lost position. Layer drift is a slow, continuous lean or twist over many layers, where each layer slips slightly more than the last. Drift usually points to a pulley slowly rotating on its shaft or a marginal belt skip, while a hard step points to a collision, a stall or a driver fault. Long prints make drift easy to mistake for shift.
Will increasing the motor current fix a layer shift?
Sometimes, and it is worth testing carefully, but it is not the default first move. Current that is too low causes missed steps. Current that is too high makes the driver run hot until its thermal protection cuts in, and that cut-out is itself a skipped step, which produces more shifts. Never change driver settings with the printer powered, and use the current value your printer’s manufacturer documents rather than a number copied from a forum post.
Is layer shifting a slicer problem or a mechanical problem?
It is mechanical or electrical in the large majority of cases. A slicer cannot move the gantry; it only commands motion. If a calibration cube prints perfectly while real parts shift, that is a clear sign the fault is in the machine, because the settings were already proven on that cube. Slicer settings such as layer height or flow can weaken bonding enough to look like shifting, so check them last rather than first.
Conclusion
Start by documenting the failure, not by changing settings. Photograph the shift, note the Z height, the direction, and whether you heard a noise, because that record is what narrows the search.
Then work outward from the cheapest checks: build-surface stability and first-layer adhesion first, thermal gradients and material condition next, then mechanical inspection of belts, pulleys, guides and the Z coupler, then motion settings, and only then the slicer. Fix one thing and re-print, because stacking five changes at once tells you nothing about which one mattered.
For production work, treat any part that shifted as suspect. The layers above the step may not bond to the layers below, so a shifted part is rarely a fit or load-bearing candidate. That parallel — a defect means the process has left its controlled window — is the same thinking that shapes how mold flash forms and how to prevent it in injection molding.